End-user / Cloud / Instances
In this page, you can do as follow:
Create new instance
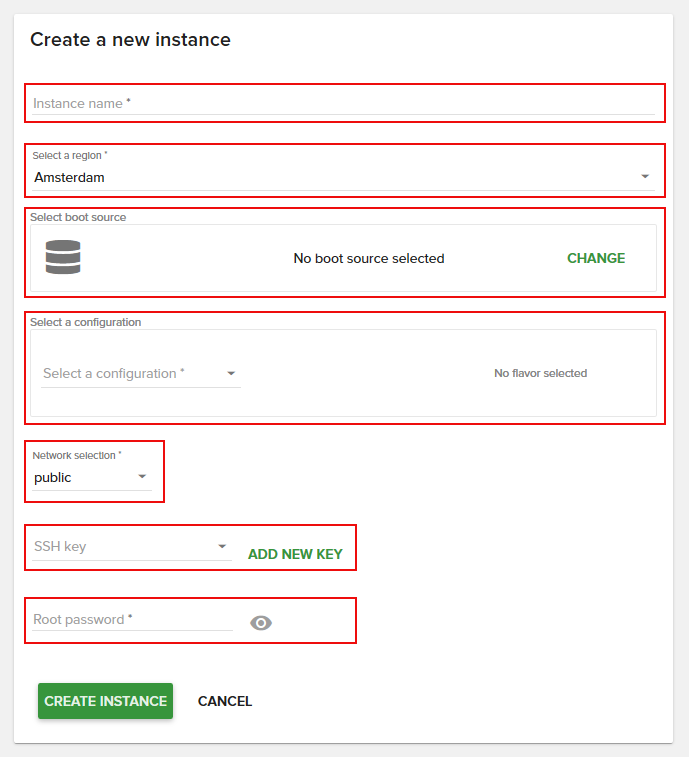
To create a new instance click the plus (+) button from the bottom-right - Create Instance.

On the following page fill in these fields:
Name: OpenStack compute instance name
Region: Select the region (location) where the instance is created.
Select boot source: The image from which the instance is booted. You can also boot from an instance snapshot if any is available.
Select a configuration: OpenStack instance flavor. Configurations (flavors) hold information about the instance memory, disk space and the number of virtual CPUs.
Cloud-init user data: Optionally, paste a cloud-init script
Network selection: Networks to which the instance is added. If no networks are shown or a network that you expect to have is missing, see how to trouble shoot this.
SSH keys: Select SSH keys to be added to the instance on boot. The SSH keys that were previously added are shown here.
Root Password: You can view the typed password by clicking on the eye icon from right.
Search for an instance
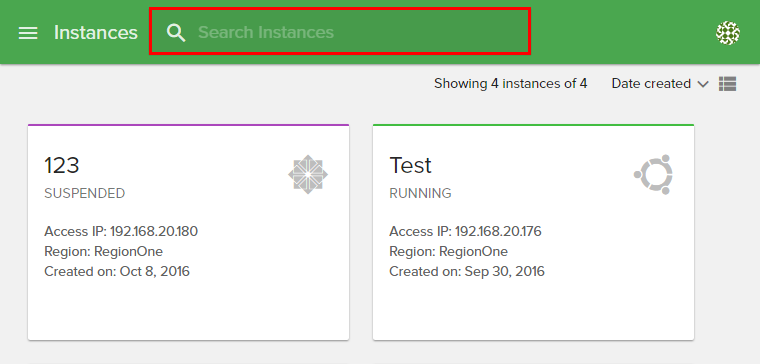
To search for an instance, type your instance name in the search box from the top of the instance page.
Sort instances
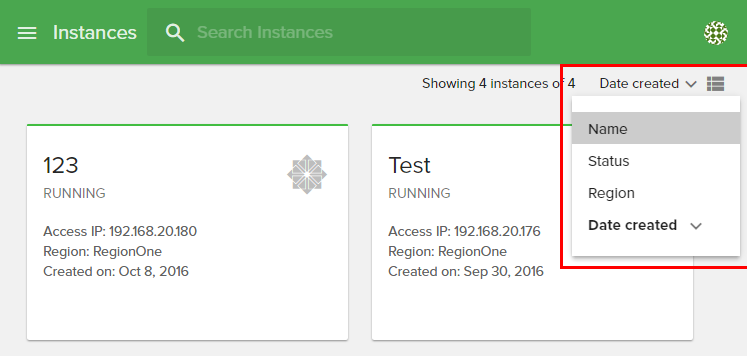
From the top-right of the page, you can sort instances by:
Name
Status
Region
Date created
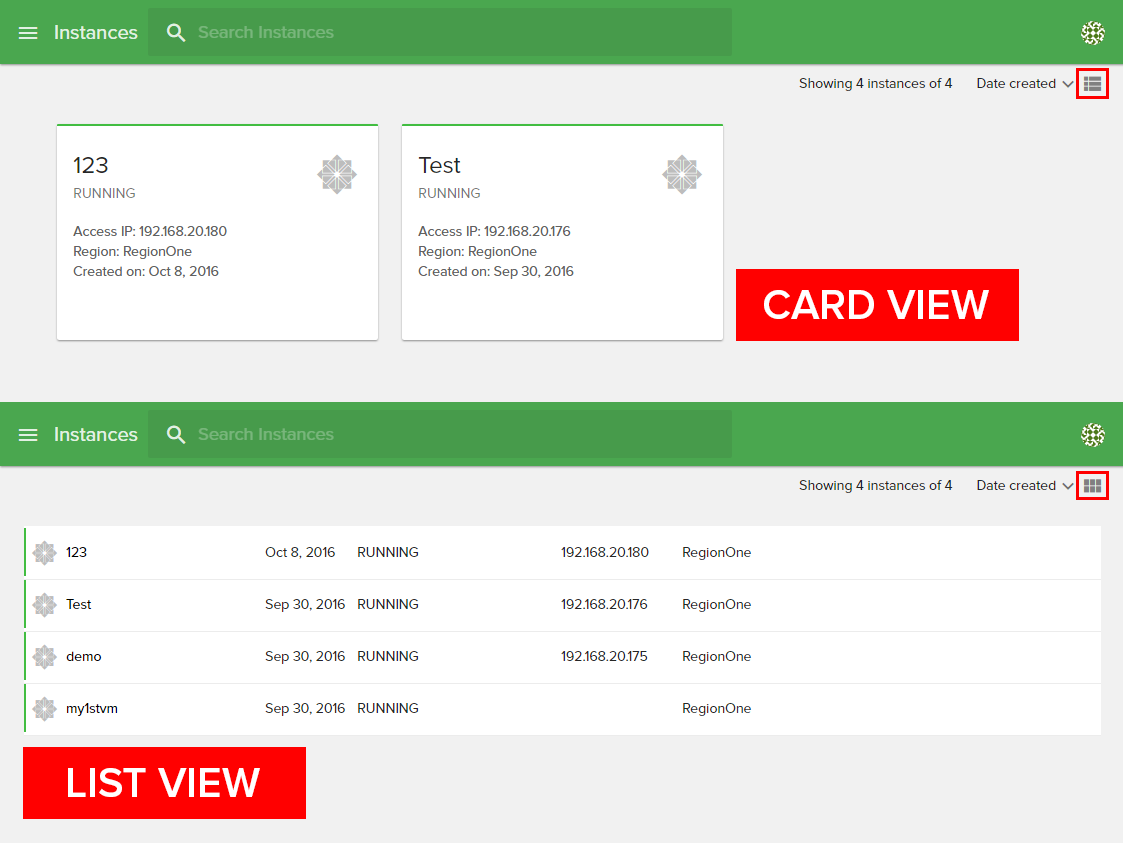
Also you can switch from Card View to List View by clicking on the grid from top-right. Examples are shown below:
Filter instances
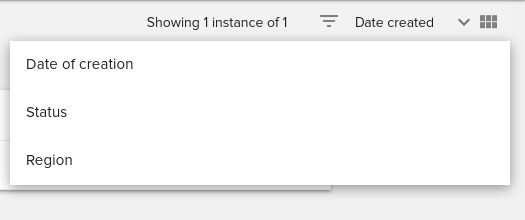
From the top right of the page, you can filter instances by:
Date of creation
Status
Region
Start / Shutdown / Reboot instance
There are two ways in interface for Start / Shutdown / Restart your instance.
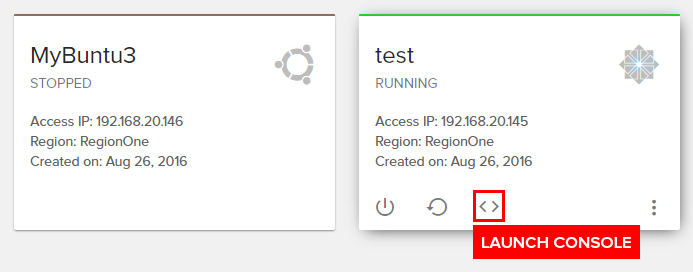
First one is directly from instance page. In each instance box, there is one icon for Start/Shutdown and one icon for Restart. See next image for reference:

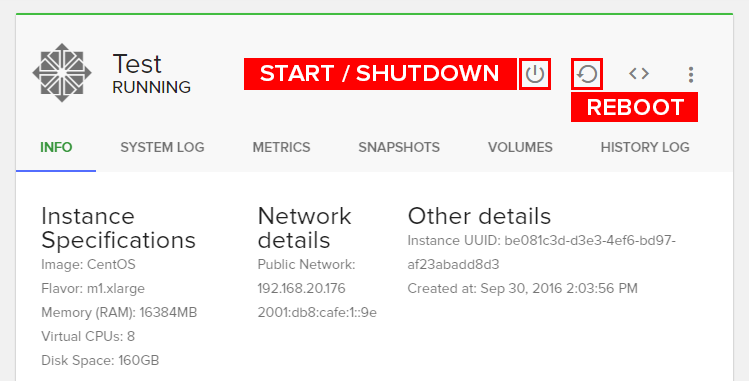
Second way is from instance details (click on the instance you want) and there you will find, in the top-right of the instance window, one icon for Start/Shutdown and one icon for Restart, as you can see below:
Login into console
You can launch the console window directly from instance page or from instance details.
Directly from instance page. In each instance box, there is an icon, as you can see below:
From instance details (click on the instance you want) and there you will find, in the top-right of the instance window, one icon for launching the console:

After the new window with the console will appear, you can login into your VPS with your user details and start working.
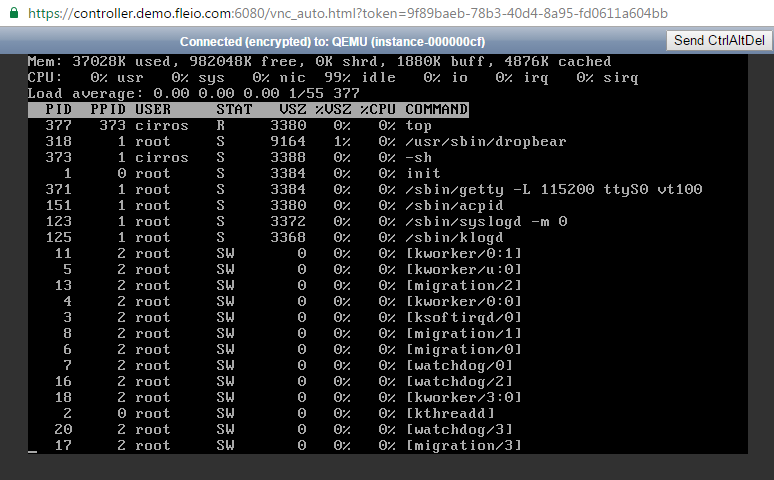
Rescue instance (recover your data)
An instance’s filesystem could become corrupted. Rescue mode provides a mechanism for access even when the VM’s image renders the instance inaccessible. For example, a user deleted a crucial file needed to launch a VM but this is only found out after reboot. Through rescue mode, you can restore the original file and start your VM.
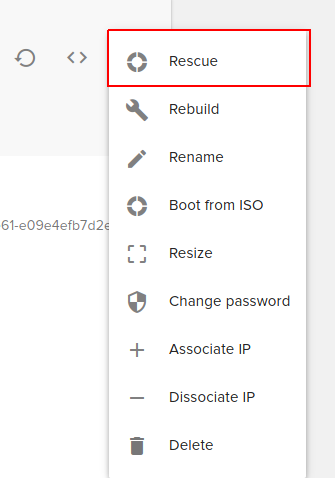
To rescue an instance click on more button (icon with 3 vertical dots) from top-right corner of the instance window and select Rescue.
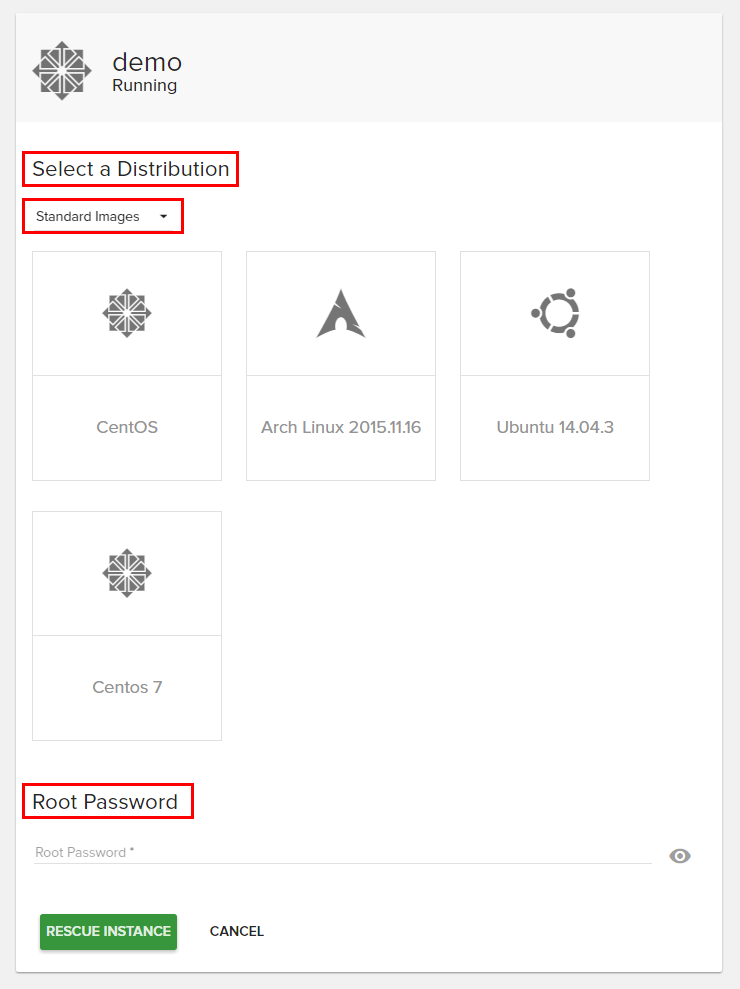
A new page will appear and here you can choose your image to install for rescue. You can choose an image from operating systems or from an old snapshot (backup). After you have set a root password you can click on Rescue Instance.
Note
Rescue Mode will not reinstall your VPS or change/delete your files. Will just create a temporary way for you, to access your files.
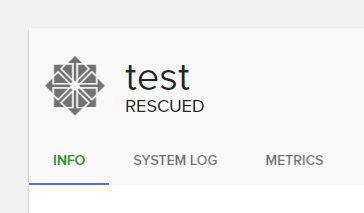
After rescue process is done you will see that your VPS status is changed to RESCUED.
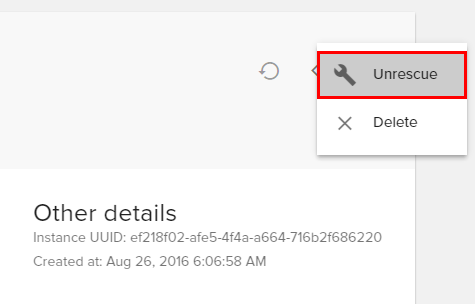
Now you can login into your VPS by launching the console and with the root password which you have set on rescue page and from there you can repair your corrupted files. After you’ve finished with that, you can exit from Rescue Mode by clicking on more and select Unrescue. Delete will delete your instance, not just rescue mode files.
Rebuild instance (reinstall instance)
Through this feature you can basically reinstall your VPS using the same or another operating system, or even you can install a snapshot from a previous backup.
Warning
All your data will be erased on reinstall. Perform a backup to avoid data loss.
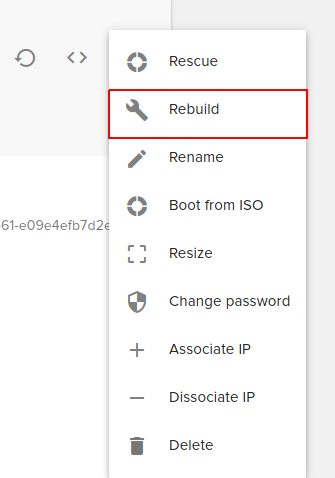
To reinstall click on more button and select Rebuild.
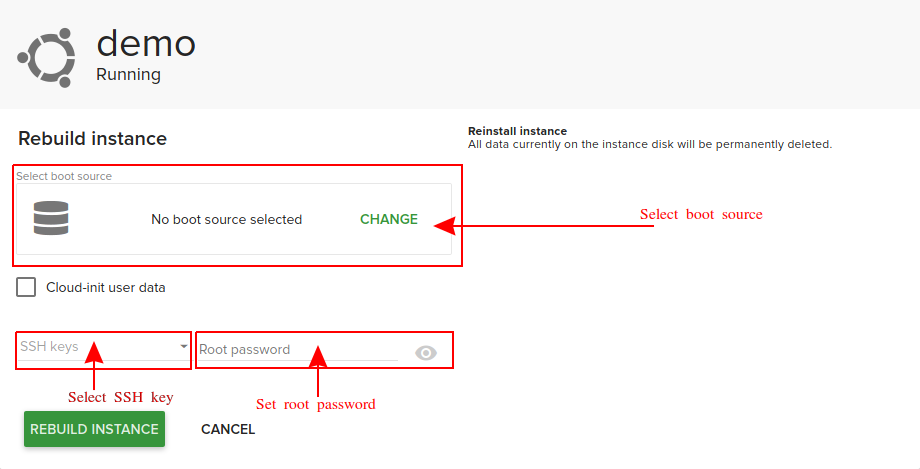
On the following page fill in these fields:
Instance Name: Set name for your new instance.
Select a Distribution: Select an image to install on your instance, and you have two types: * Standard Images (you can choose between CirrOS, Ubuntu, Centos, Arch Linux, etc.) * Snapshots (you can choose from a previous snapshot already created)
Root Password: The password should be at least 8 characters long and should contain at least one digit or symbol.
Hit Rebuild Instance and the reinstall process will start.
Rename instance
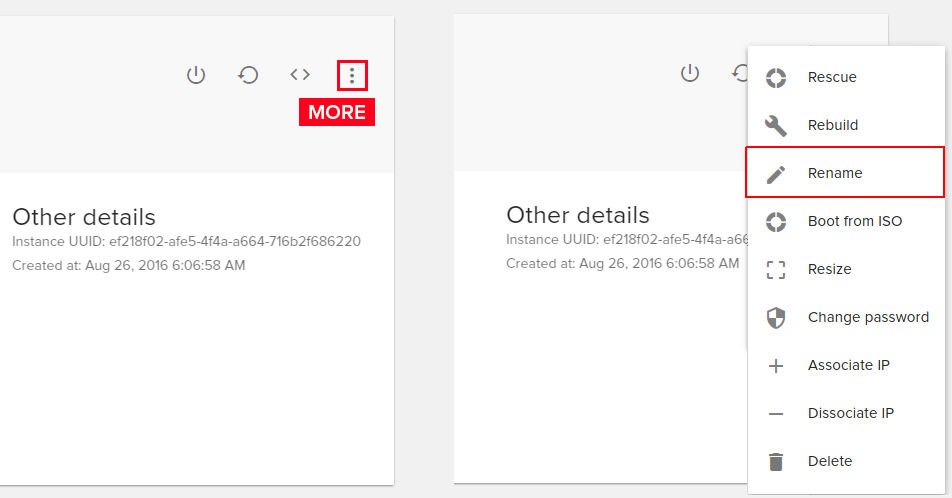
If you want to rename an instance, click more and select Rename. Enter the new name and click on Rename Instance. This will set the name in the Fleio and OpenStack database. The hostname inside the instance will not be set.
Shelve instance
In order to shelve the instance you need to click on the 3 dots available in the top right corner, and then click on the Shelve instance button:
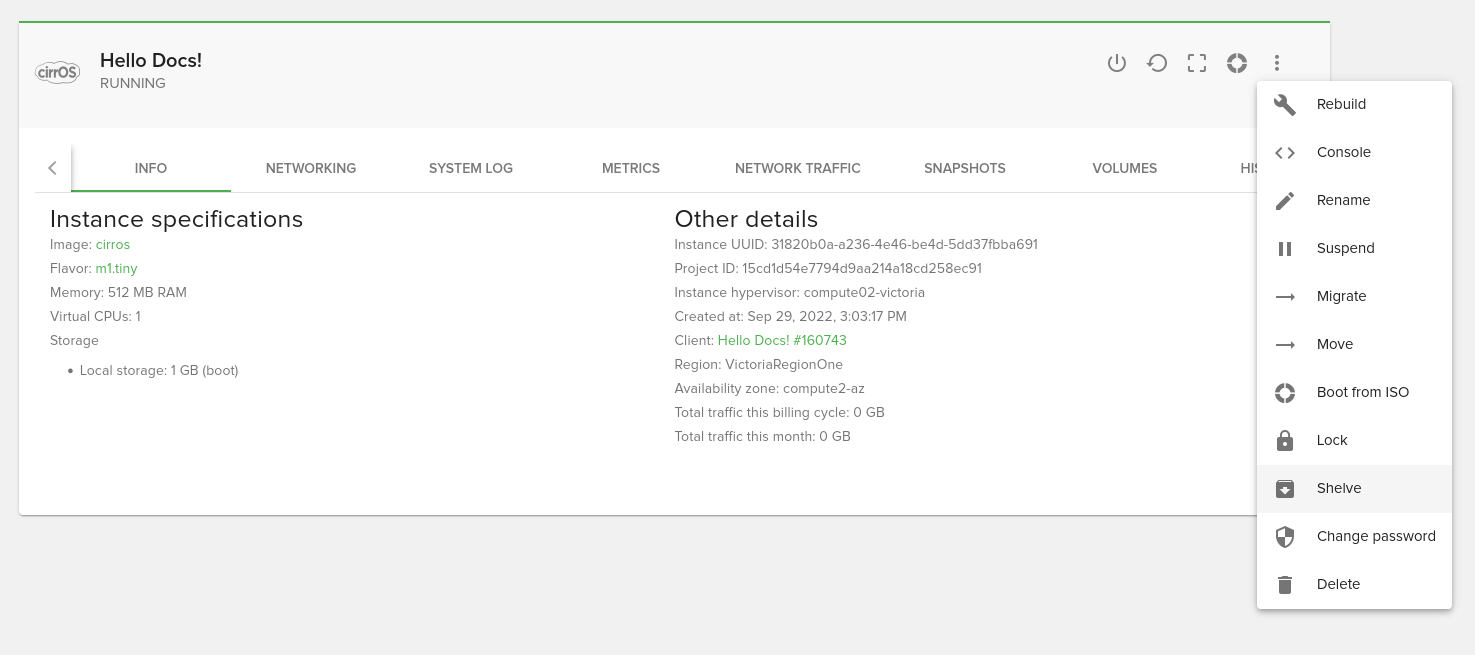
Shelving an instance will create a snapshot and remove it from the compute node. Depending on your cloud provider settings this may reduce monthly cost for the instance since a shelved instance uses less resources.
Only instances with one of the following statuses can be shelved: Running, Stopped, Suspended an Paused.
Unshelve instance
In order to unshelve the instance you need to click on the Unshelve instance button:
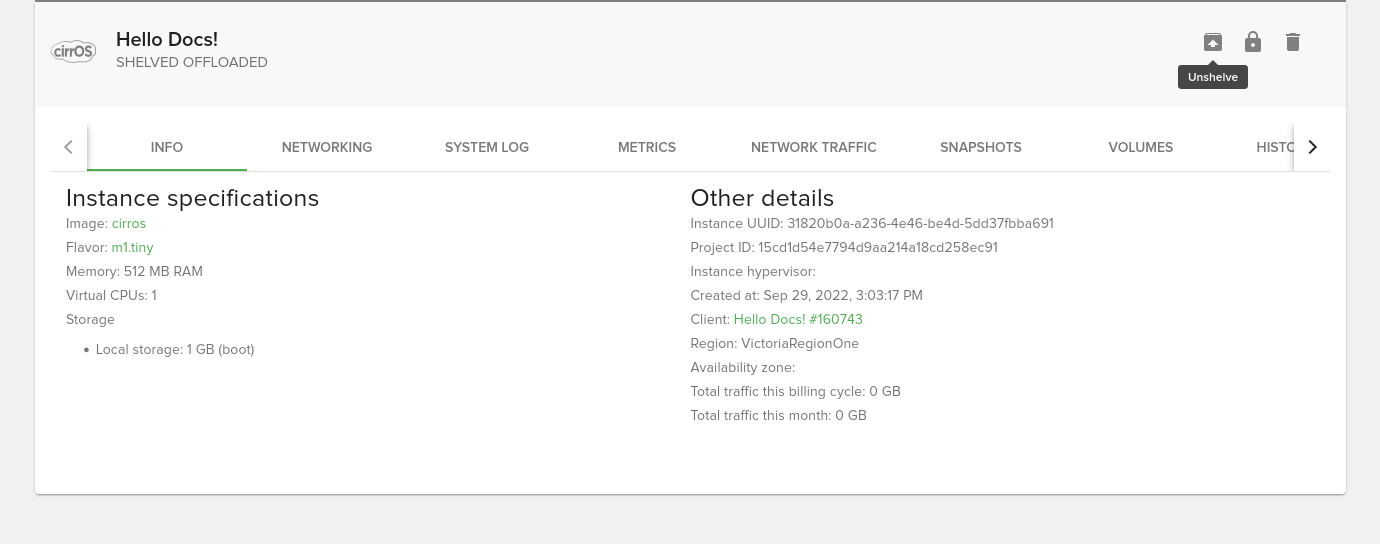
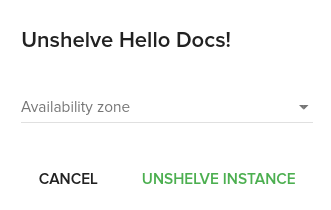
Unshelve will restore the instance to running state. A confirmation dialog will displayed when unshelving instance allowing the user to select an availability zone if the instance is not yet offloaded (status Shelved Offloaded).
Resize instance (upgrade CPU, RAM, HDD)
Resizing means upgrading your current VPS to have more CPU, RAM or HDD. We’ve already have some flavors (templates) already defined, and you can select the one you want.
To resize (upgrade) an instance, click more and select Resize.
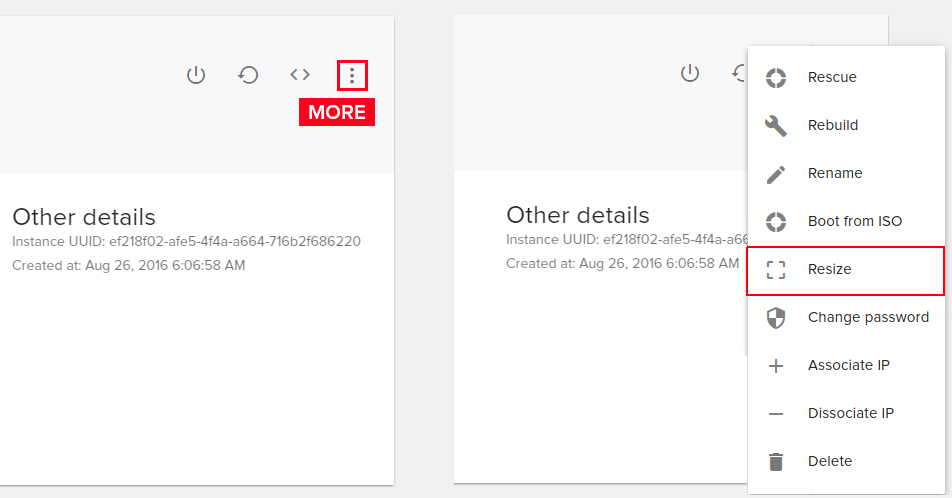
A new page will appear and here you can select the configuration which you need. Click on Resize Instance and wait for the process to be finished.
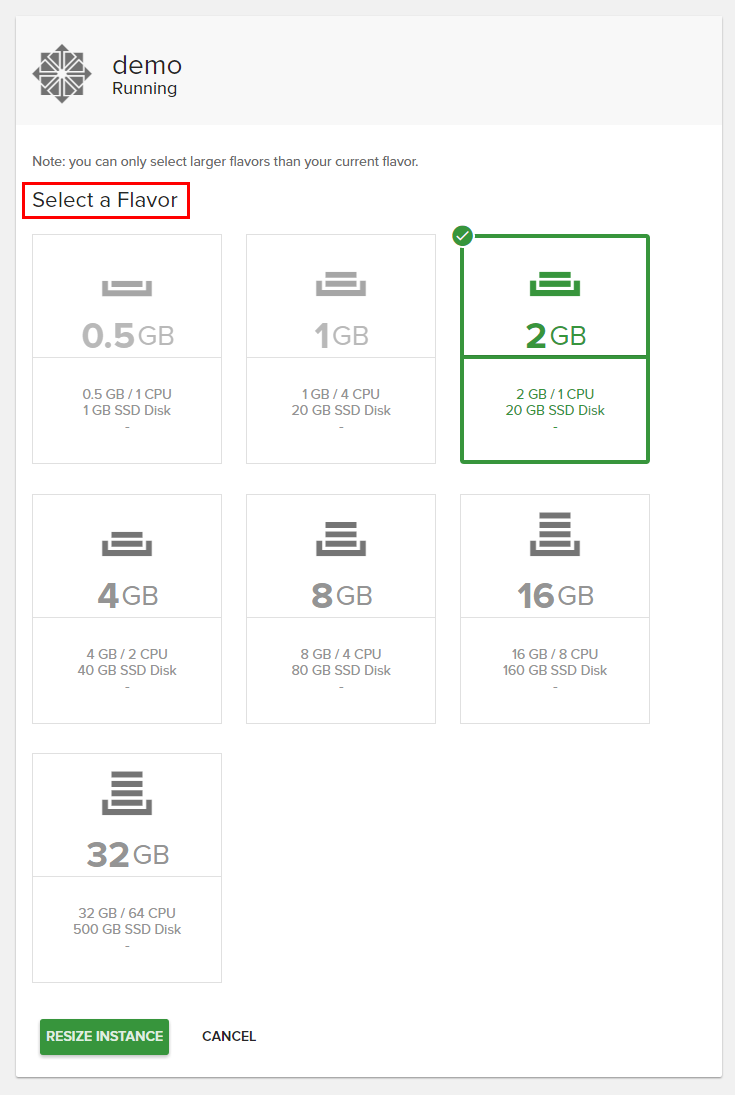
Final step will be to Verify Resize and you can click on Confirm Resize or Revert Resize. Delete will delete your instance.
Note
Instance downgrade is not supported, only instance upgrade is supported.
Change root password
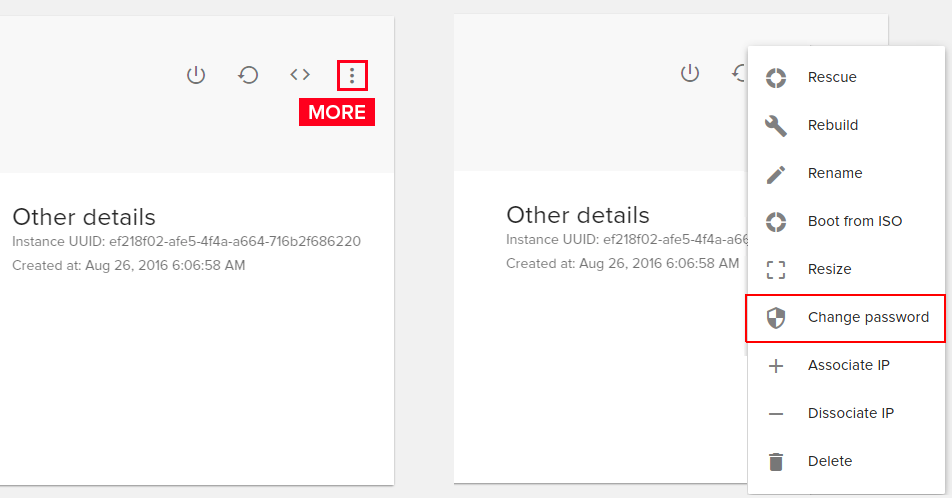
To change root password for your current instance, click more and select Change Password. Enter the new password and click on Change Password.
You can view your typed password by clicking on that eye icon from right. The password should be at least 8 characters long and should contain at least one digit or symbol.
Delete instance
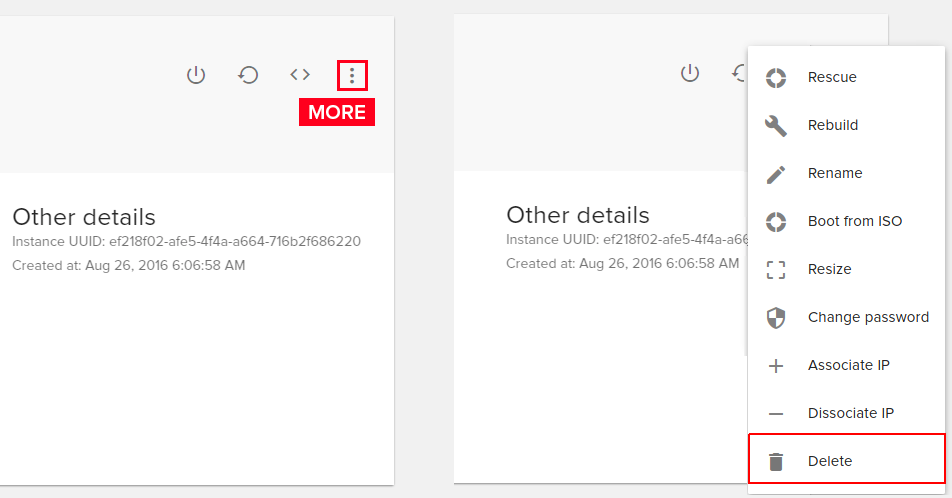
If you want to delete an instance click More and select Delete.
View instance details (operating system, RAM, CPU, HDD, created at, IP, region)
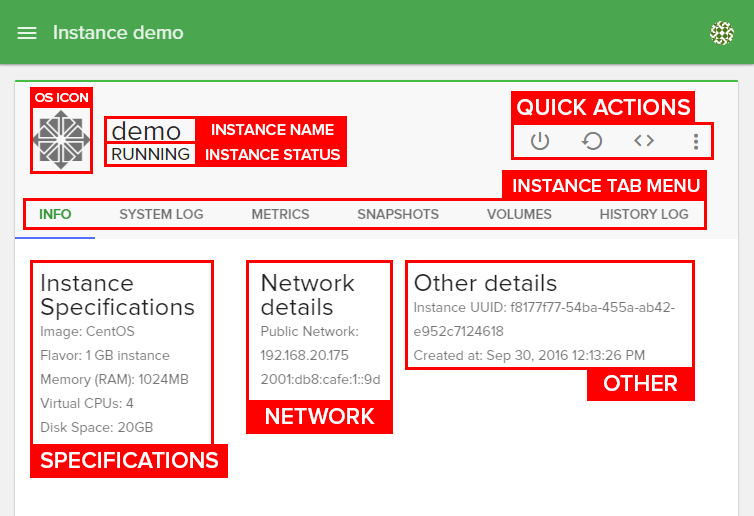
To find more details about your instance just click on instance box from Instance page. A new page will open and here you’ll find all details about your instance as follow:
Instance details area
OS Icon: Shows instance operating system icon (Centos, Ubuntu, etc.)
Instance name: The name in the Fleio and OpenStack database. Could be different from the hostname inside the instance.
Instance status: Depending on the instance state, it could be: Running, Stopped, Mounting, Rescued, etc.
Quick actions: Used for: Shutdown/Start, Restart, Launch Console, More (Rescue, Rebuild, Rename, Resize, Change password, Delete).
Instance tab menu: Access to following subpages: Info, System Log, Metrics, Snapshots, Volumes, History Log, Security Groups
Specification: Details about instance (installed image, flavor, RAM, CPUs, disk space)
Network: Details about network (private and public IPs)
Other: Other details like instance unique number and instance data creation
View system log
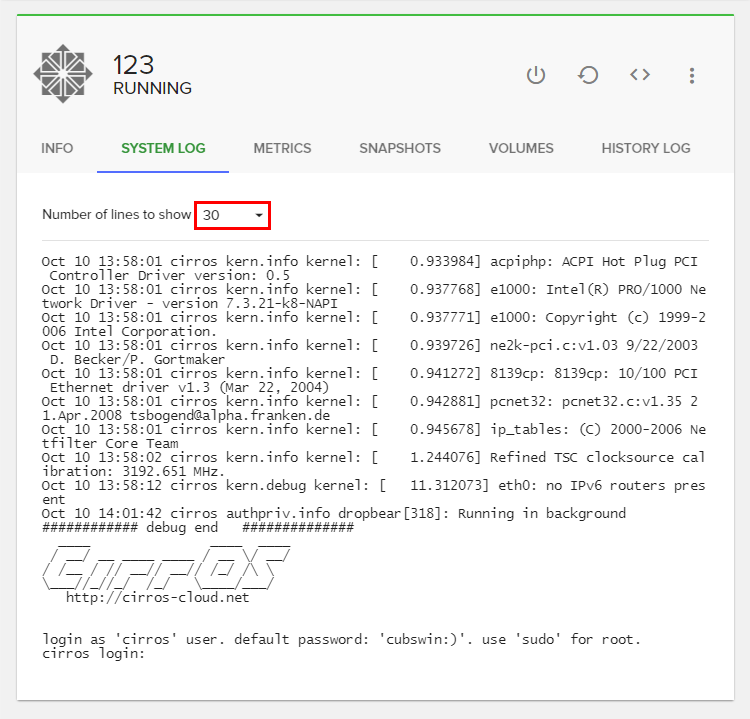
You can view directly the system log of your instance by accessing the System Log tab from instance details. To show more lines, you have a select field for this.
View metrics (Network traffic / CPU usage)
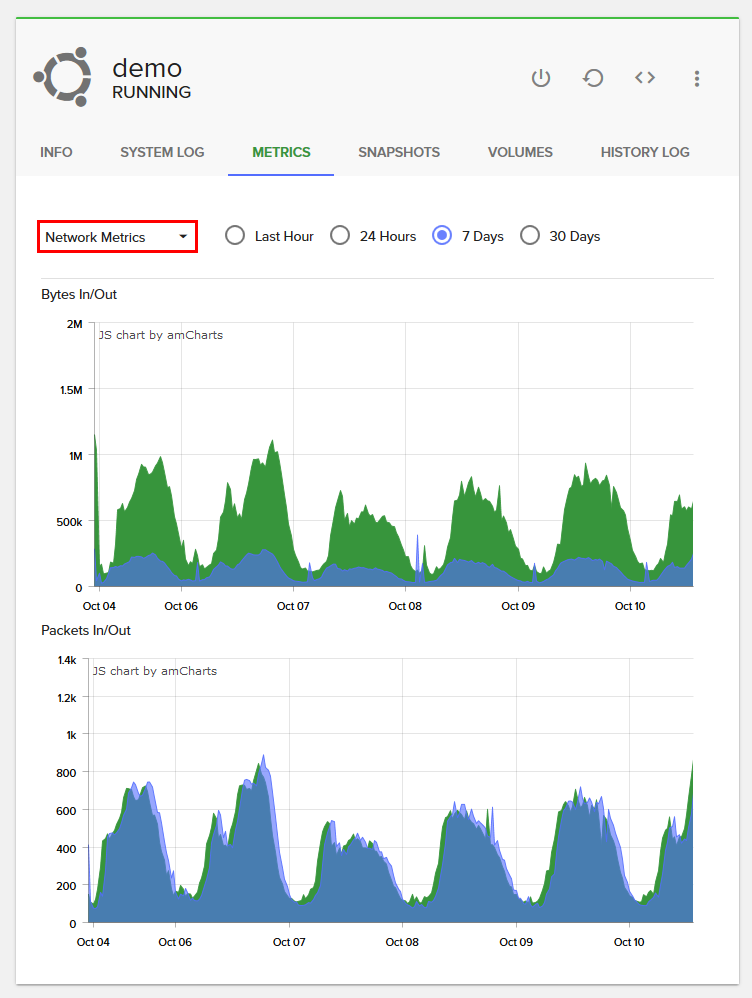
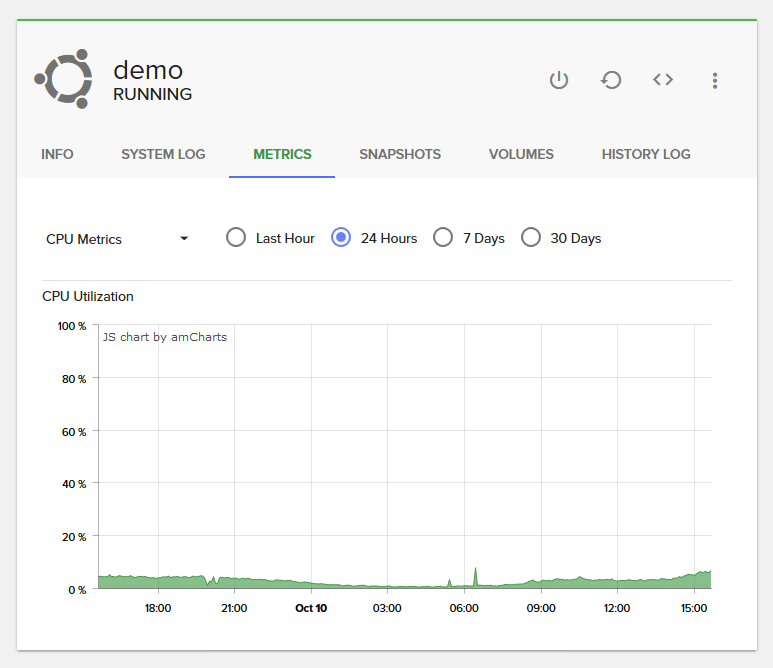
To view instance metrics like Network Traffic or CPU Usage go to Metrics tab from instance details. Select Network traffic or CPU Usage and filter them by: last hour / 24 hours / 7 days / 30 days.
Create snapshot
Snapshots are actually images of your current instance. You can use them to backup your instance and restore it later. Also, you can duplicate an instance by making a snapshot of an instance and install that snapshot as another instance.
To create a snapshot of your current instance, select your instance and click on Snapshots tab. Finally click on Create Snapshot.
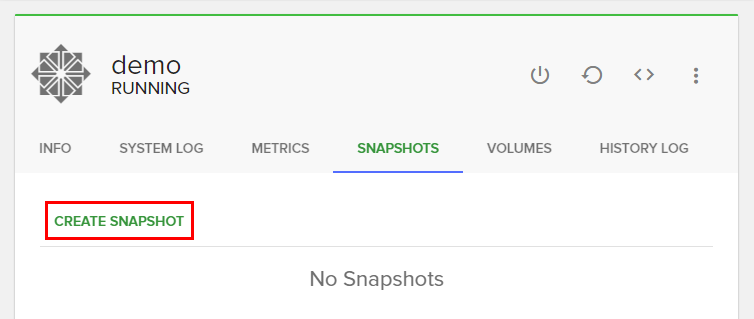
After creation, all your snapshots will be visible in this tab, and will be also visible in Images page. From Images page, you can delete the snapshots or deploy new instances from snapshots.
Attach / Detach Volume
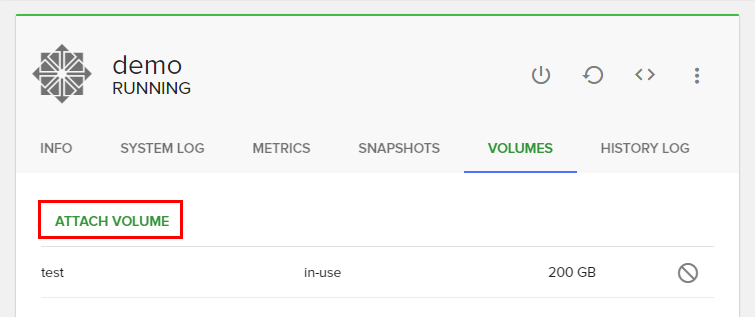
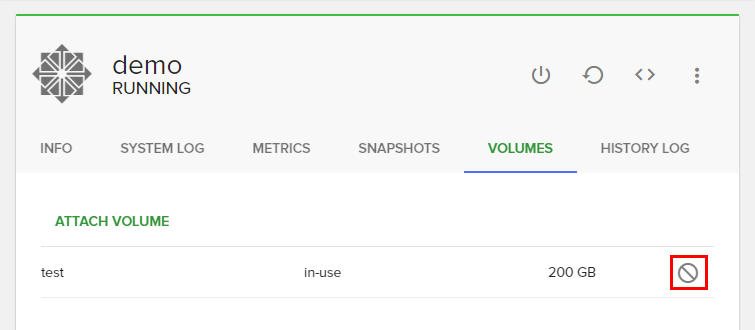
A volume is a detachable block storage device, similar to a USB hard drive. A volume can obly be attached to one instance. To attach or detach a volume to your current instance, select your instance and click on Volumes tab.
To attach, click on Attach Volume (example in the image from below):
To detach, click on the icon Detach Volume (image below):
History log
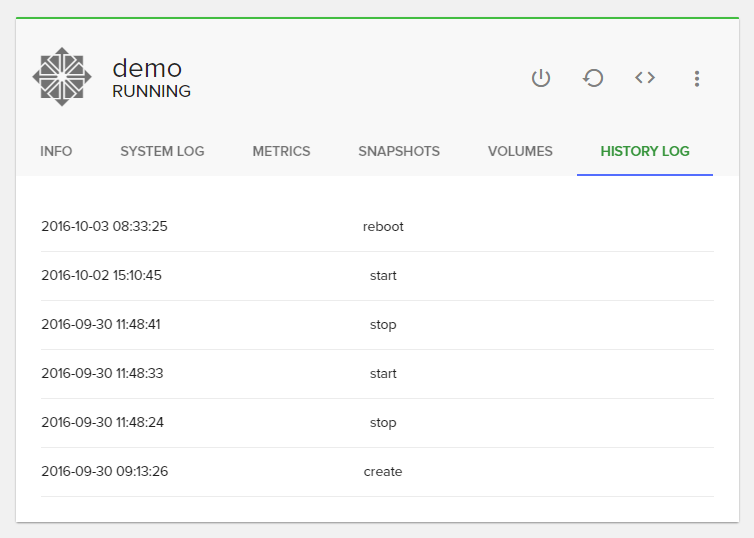
To view history log for an instance, select your instance and click on History Log tab. Here you will find all actions made on your instance, like rescued, unrescued, rebooted, changed password, etc.
Security Groups
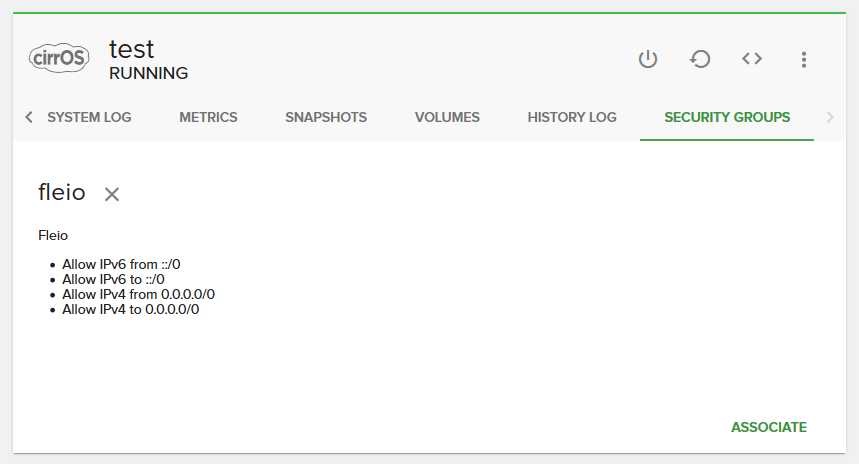
Security groups and security group rules allows users the ability to specify the type of traffic and direction (ingress/egress) that is allowed to pass through a port. A security group is a container for security group rules.
When a port is created in networking it is associated with a security group. If a security group is not specified the port is associated with a ‘default’ security group. By default, this group drops all ingress traffic and allows all egress. Rules can be added to this group in order to change the behaviour.
Backups
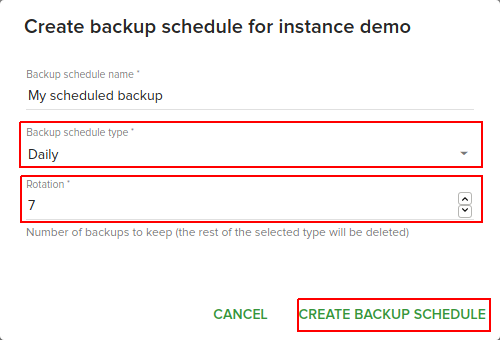
From backups tab, you can create instant backups or schedule a backup rotation for the selected instance.
Note
For scheduled backups to work, you need to define the scheduled backups task schedule.
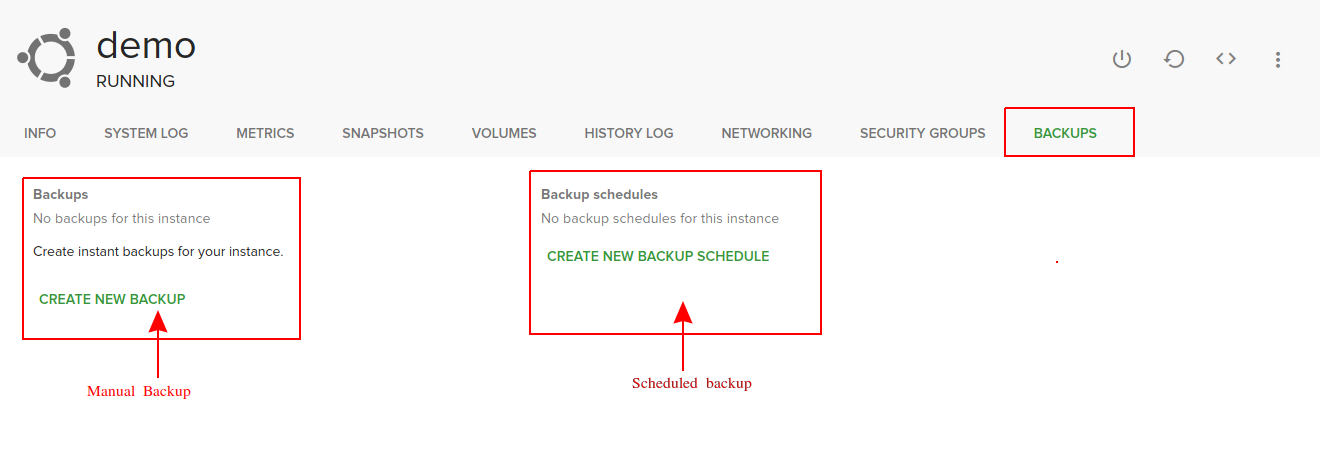
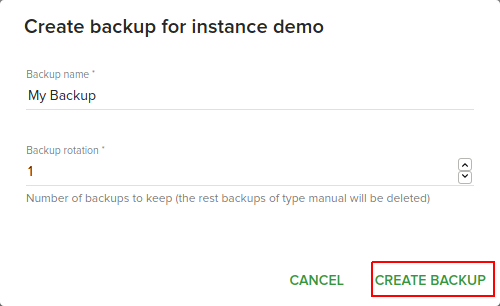
To create an instant backup click the Create new backup as it’s shown in the picture below.
To schedule a backup click the Create new backup schedule as it’s shown in the picture below.
