Staff / Settings / General
The general settings page consists of a panel with two tabs where you can manage the application currencies and licence.
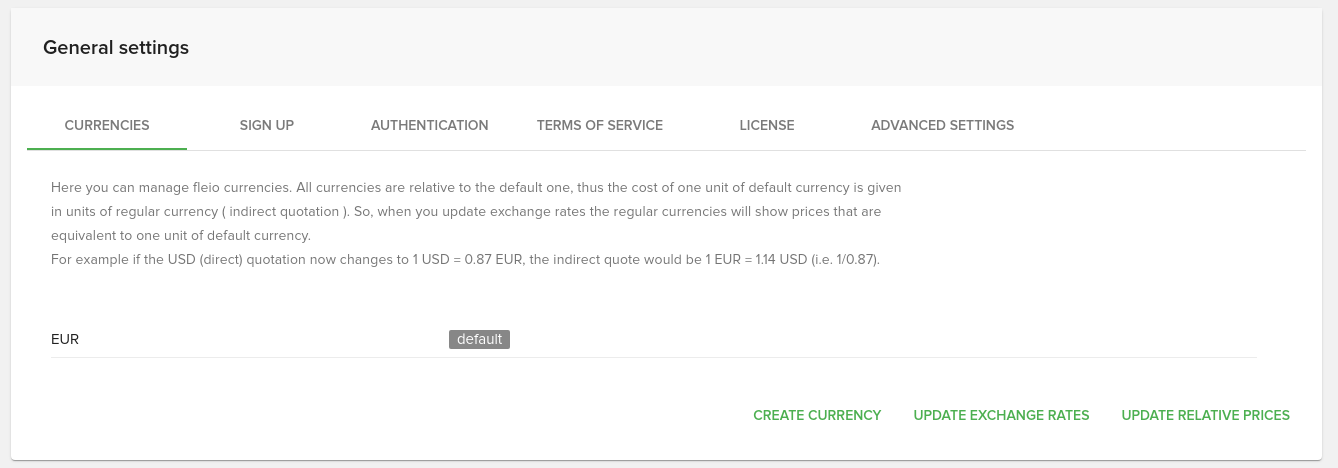
Currencies
To understand how Fleio handles currencies, see Multi-currency.
On the currencies tab you can see a list of available currencies in your app and manage them.
Create currency
To add a new currency to Fleio, click on the CREATE CURRENCY button at the bottom.
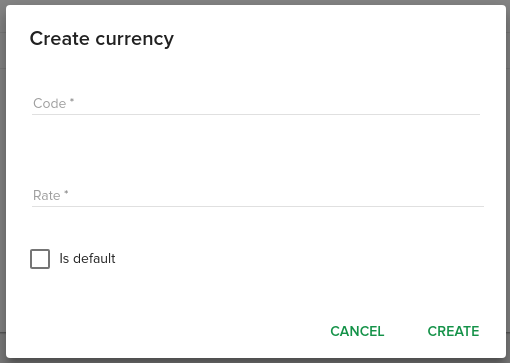
You have to set a default currency (or “global default currency”). The default currency is used to define exchange rates to the secondary currencies. When new clients sign up their default currency is set to this global default currency. The credit limits from Configuration fields are also using this global default currency.
Make sure that the currencies you add in Fleio are also available in your payment processor gateway(s).
All currencies are reported to the default one, thus the cost of one unit of default currency is given in units of regular currency (indirect quotation). Use the UPDATE EXCHANGE RATES button from the bottom right corner of the card so the regular currencies will update and show prices that are equivalent to one unit of default currency.
Exchange rates updating settings
You can define a “connector” as the source for updating currency exchange rates and configure Fleio to automatically update exchange rates on a defined schedule.
To configure currency exchange rate connector, see ref:exchange-rate-settings. The connector is used when you press UPDATE EXCHANGE RATES in the staff panel and, optionally, on scheduled currency exchange rate update.
To enable scheduled currency exchange rate update, see Update currency exchange rate task schedule.
Update relative prices
When you press the UPDATE RELATIVE PRICES button, the price of the product billing cycles that have Auto calculate prices checked is updated based on the currency exchange rate.
To automatically update relative prices every time “process clients” scheduled task runs, set
UPDATE_RELATIVE_PRICES_BEFORE_PROCESSING_CLIENTS variable to True. For more information, see
Process clients task schedule.
Using this option will update the prices on all products that are configured with multiple currencies, while having an auto calculated price based on the default currency.
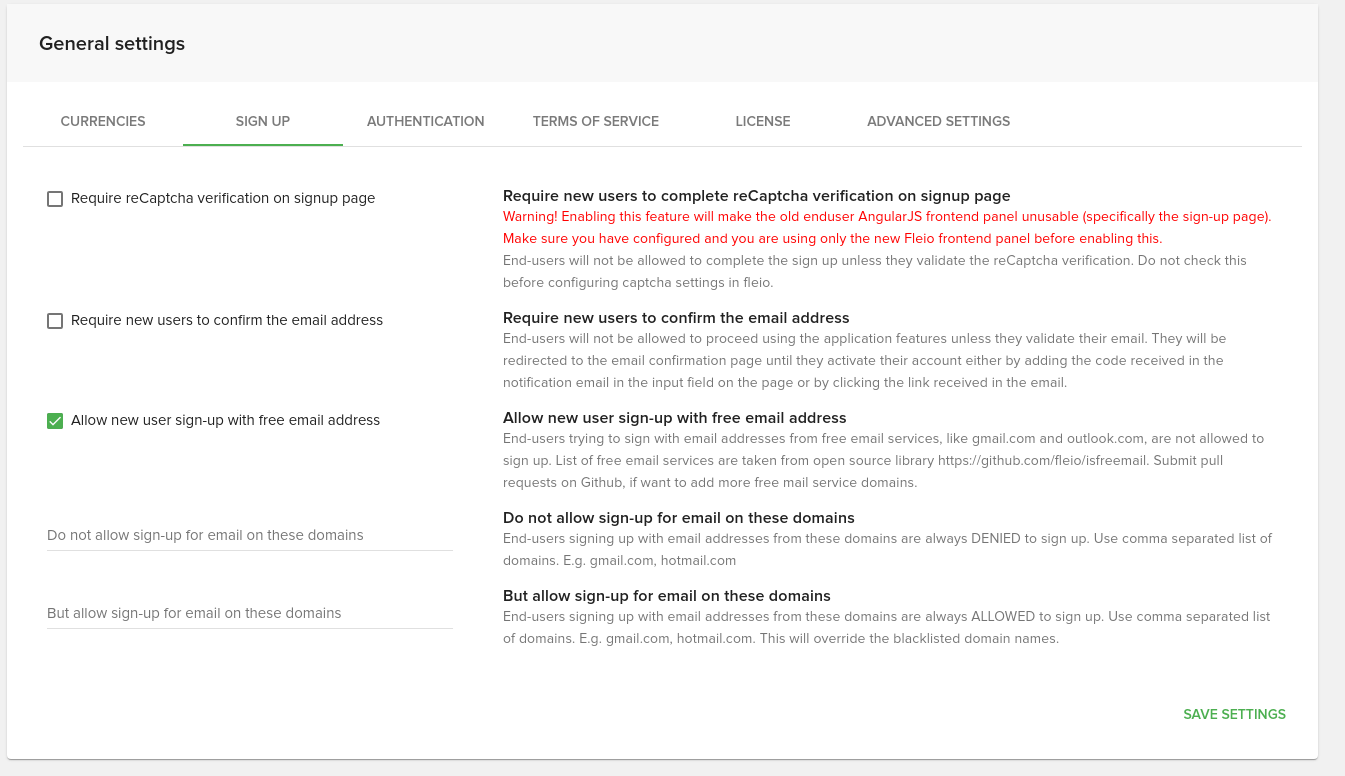
Sign UP
On this tab you will be able to some of the settings that are related to the Sign UP process.
Single sign-on
On this tab you will be able configure Single sign-on in Fleio.
SAML 2 single sign-on settings
This section allows you to configure SAML 2 Single sign-on in Fleio. In order for these settings to be active you need to define at least one IDP.
Once at least one IDP is configured for staff or enduser panel you can then use Enable SAML 2 single sign-on checkbox to activate SAML 2 single sign-on for a panel and if you want you also have the option to disable Fleio authentication using Disable Fleio authentication checkbox.
Note that if an user does not exist in Fleio it will be created during sign-in. Fleio uses email address to identify users.
Warning
Disabling Fleio authentication with an incorrect IDP configuration may cause you to lose access to Fleio.
SAML 2 certificate information
Here you can configure the SAML 2 certificate used by Fleio.
During Fleio install or upgrade a new self signed certificate valid for 10 years is generated. You have the options to regenerate this certificate or upload a new one.
Warning
Changing the certificate will change Fleio SAML 2 metadata and you will need to reconfigure all identity providers with the new metadata.
SAML 2 identity providers
Here you can configure SAML 2 identity providers.
Steps to configure an identity provider:
Export Fleio service provider metadata - this can be accomplished by clicking GET SAML 2 METADATA button. You may need to save this to a
.xmlfileGo to your third party authentication provider and configure an identity provider (IDP):
all Fleio related URLs and data needed by Fleio are defined in the metadata from step 1 - the third party authentication provider should allow you to set or upload this metadata
if the third party authentication provider does not give you any option to upload metadata you can manually configure entity id, URLs and field mappings - you can find these in Fleio metadata
you may be asked to define an entity id for the IDP - choose something unique like your domain name
some third party authentication providers (e.g. jumpcloud, Google) require you to assign the newly created IDP to users or user groups to allow login with those users - make sure the IDP users/user groups are properly configured
Export IDP metadata or get IDP metadata url:
some IDPs will give you an option to export metadata or a link to download metadata or both - Fleio supports both options
once you have a way to obtain IDP metadata you can configure the IDP in Fleio - if you use URL make sure to click FETCH METADATA FROM URL button
Enable SAML 2 single sign-on in Fleio using checkboxes on this tab
Once all the above steps are completed a Sign on with <IDP Label> button should appear on login form and you should be able to use it to sign on with the newly configured IPD.
Authentication
From this tab you can manage some settings regarding second factor authentication.
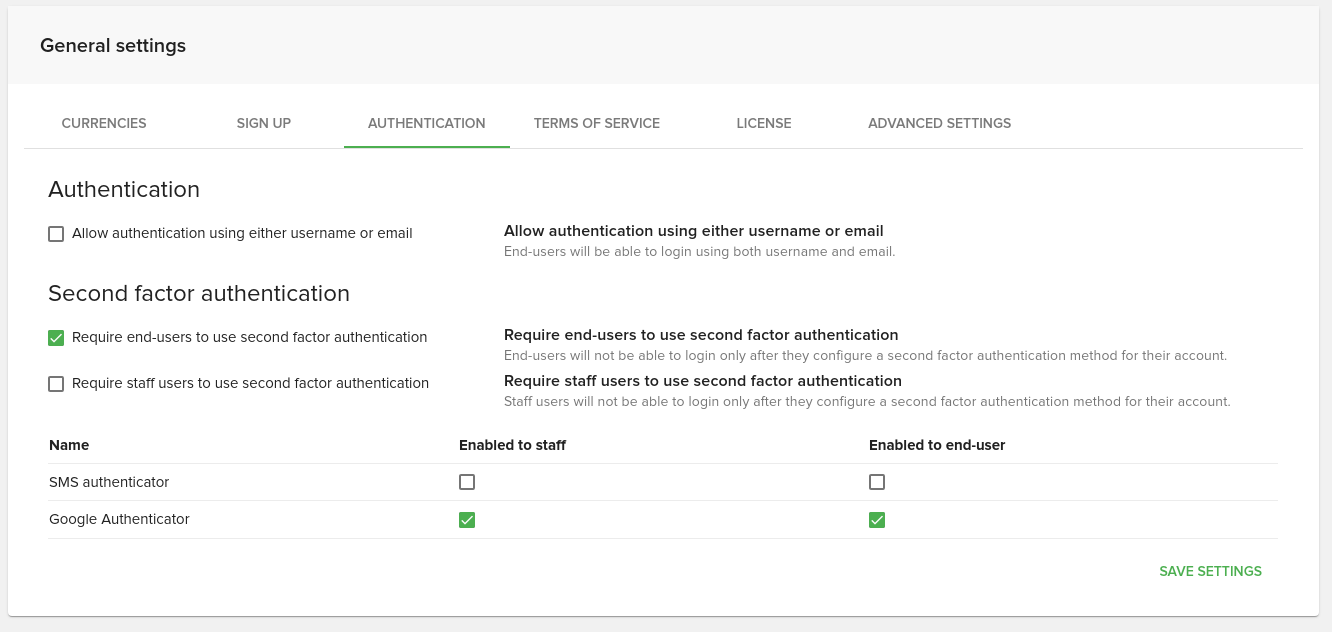
The first checkbox will allow your endusers to login using either username or email address.
Second factor authentication
The next two checkboxes control whether users are required to setup second factor authentication on their account or not. When these settings are active, and a user doesn’t have second factor authentication configured, he won’t be able to use any of the fleio functionality until he configures a 2fa method.
At the bottom you cna configure what type of 2fa method do you want to allow your users to configure. Note that for SMS authenticator, you will need to set the provider. Please see Second factor authentication.
Terms of Service
On the “TERMS OF SERVICE” tab you will be able to define templates for ToS. In order to add a new template for ToS you will have to add a new ToS from the menu shown below:
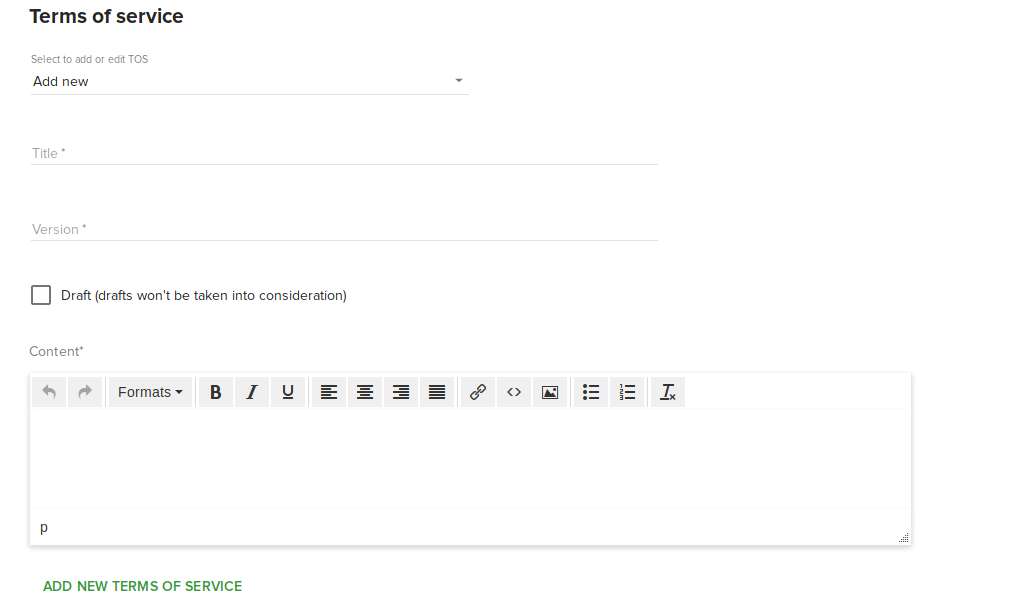
The version tag is used when you want to update the same ToS and you want to enforce your end-user to re-accept the new ToS. Please note that you will have to be consistent when defining the version as they are automatically ordered. We recommend to use the following format: tos-template-name.v.0, tos-template-name.v.1, tos-template-name.v.2 and so on.
For a better understanding of version control, you can read more about the version control guidelines.
In order to enforce the end-user to re-accept the ToS you will have to check the “Ask end-users to agree with the latest ToS”. Also, you can forbid access to the Fleio end-user panel after YYYY-MM-DD h:m:s if the user did not accepted the ToS.
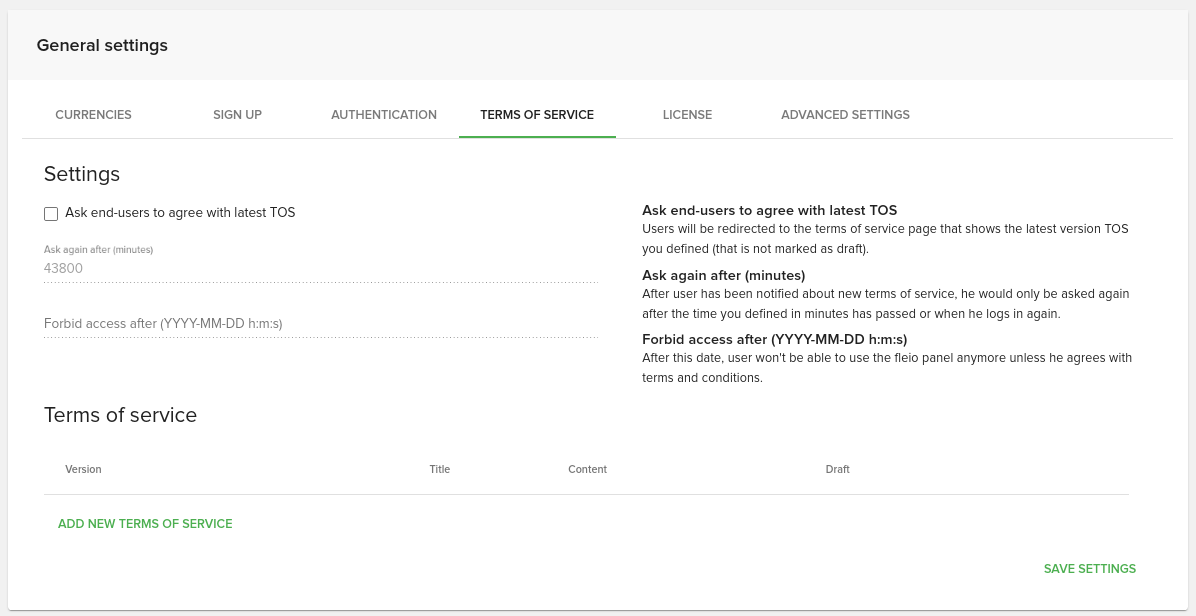
If the end-user will use the remind me later timer option, it will be reminded after x minutes (configured in the ask again box) or after he logs in again.

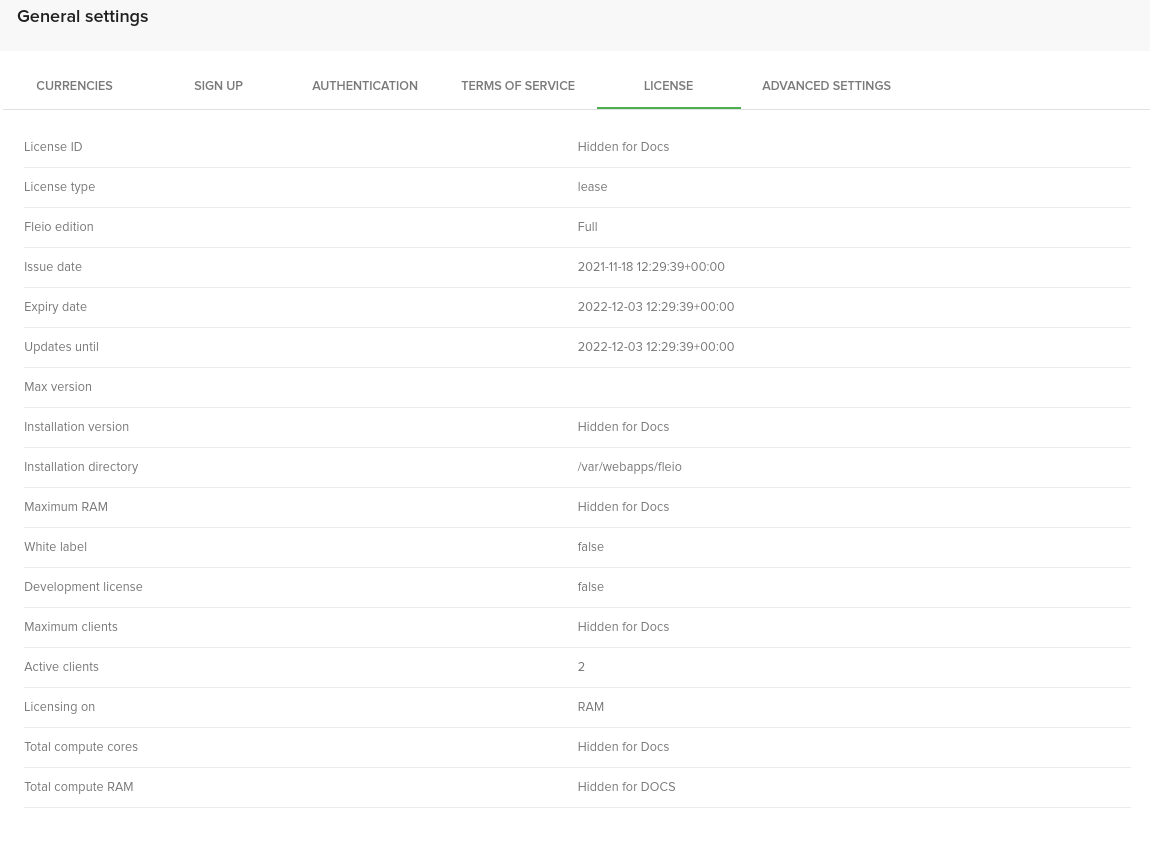
License
Here you can set a new licence, refresh the current one or see details about it. You can obtain a license from Fleio.
Advanced settings
Important
Changing any option from this tab may have undesirable effects on Fleio functionality.
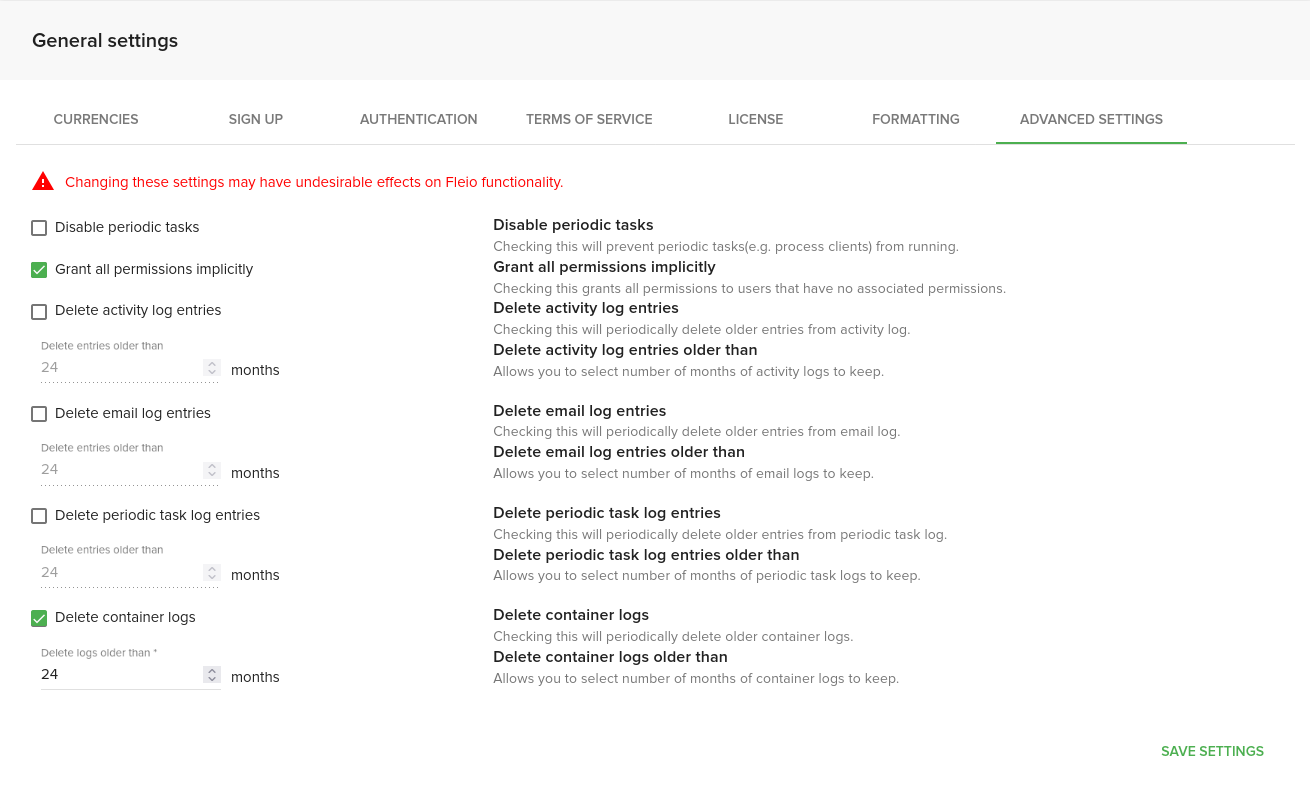
The following settings are available in ADVANCED SETTINGS tab:
Disable periodic tasks - This will disable all periodic tasks (e.g. process clients) from running
Grant all permissions implicitly
This will grant all permissions to users that have no associated or inherited (from group) permissions. This applies to both staff and end users
Unchecking this will disable almost all functionality for users that do not have associated or inherited permissions
Delete activity log entries - Checking this will periodically delete older activity log entries
Delete email log entries - Checking this will periodically delete older email log entries
Delete periodic task log entries - Checking this will periodically delete older periodic task log entries
Delete container logs - Checking this will periodically delete older container log files