Staff / Cloud / Images
Have same functionality and features like the one from the Client Images.
Create new image
To create a new image click the plus (+) button from the bottom-right - “Create Image”.
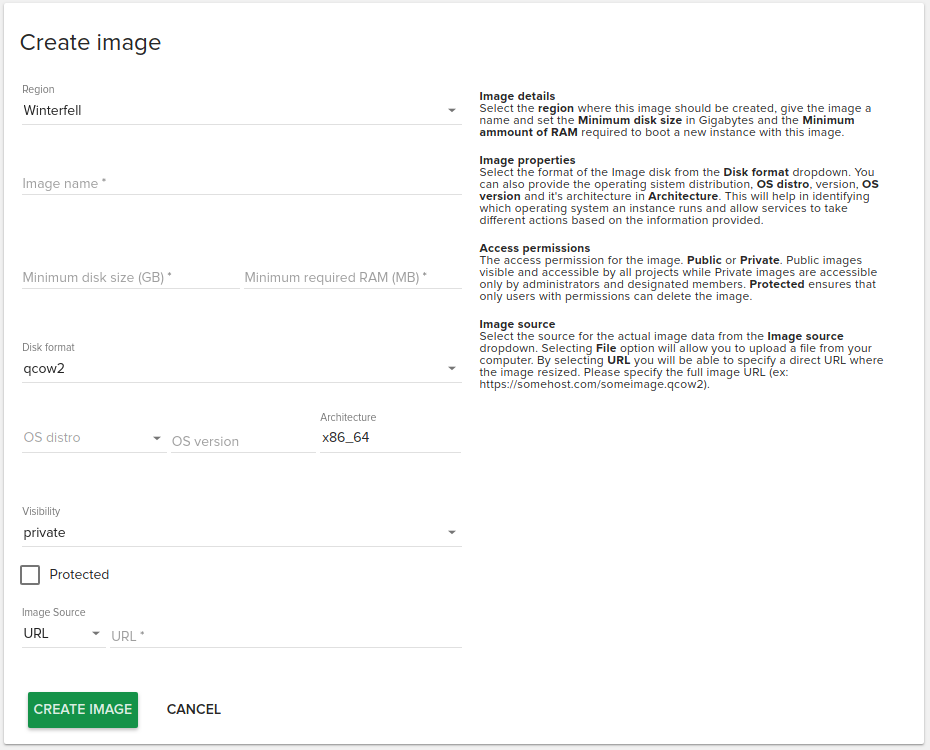
On the next page fill in these fields:
Region: Select the region where this image should be created
Image name: Give the image a name
Minimum disk size: The amount of disk space.
Minimum required RAM (MB): The amount of RAM.
Disk format:
raw This is an unstructured disk image format
vhd This is the VHD disk format, a common disk format used by virtual machine monitors from VMware, Xen, Microsoft, VirtualBox, and others
vhdx This is the VHDX disk format, an enhanced version of the vhd format which supports larger disk sizes among other features.
vmdk Another common disk format supported by many common virtual machine monitors
vdi A disk format supported by VirtualBox virtual machine monitor and the QEMU emulator
iso An archive format for the data contents of an optical disc (e.g. CDROM).
qcow2 A disk format supported by the QEMU emulator that can expand dynamically and supports Copy on Write
aki This indicates what is stored in Glance is an Amazon kernel image
ari This indicates what is stored in Glance is an Amazon ramdisk image
ami This indicates what is stored in Glance is an Amazon machine image
Visibility: Public, shared, community or private.
Is protected: Image delete protection.
Architecture: Set operating system on 32 bit or 64 bit.
OS distro: Set operating system.
OS version: Set operating system version.
Image source: Select the source for the actual image data by uploading a file or setting an url
Note that if you try to upload a large image the upload may fail, if so you may want edit nginx configuration and adjust
client_max_body_size setting. By default Fleio allows image sizes up to 5000MiB.
Updating an image
To update an image, click the following button from the actions area of an image:
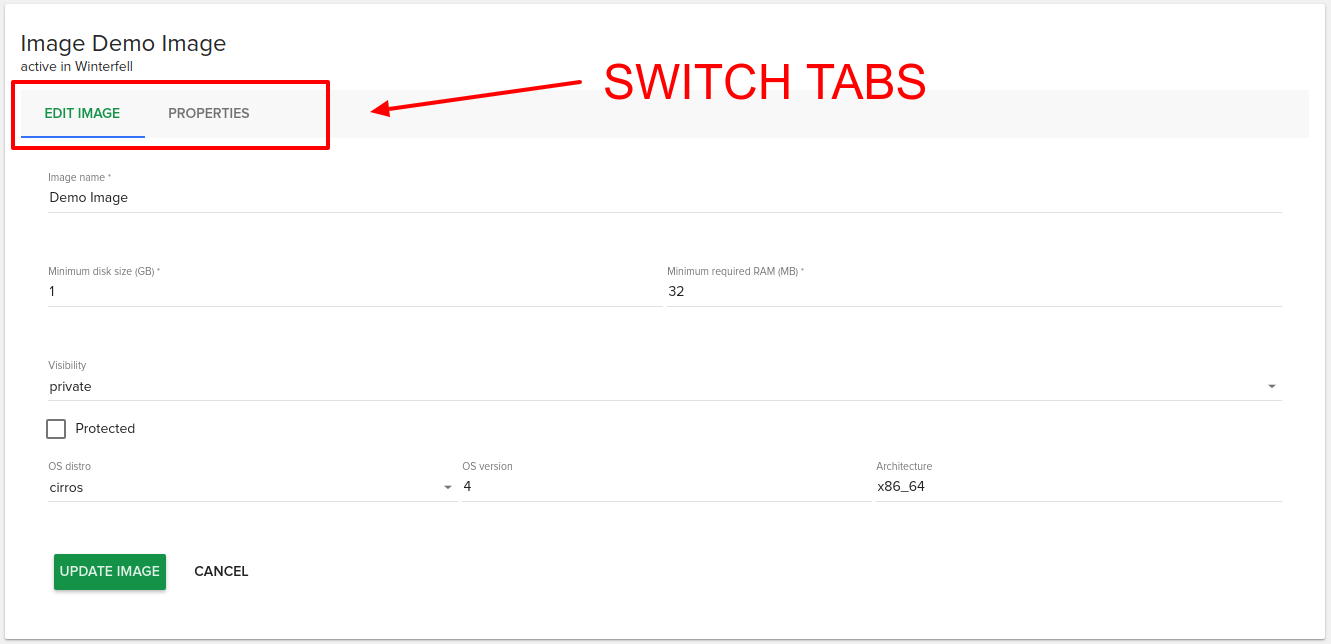
You will be redirected to a new page with two tabs:
Edit Image: edit the same fields as in the create image page
Properties: set or remove custom properties for the image
Edit Image tab
Properties tab
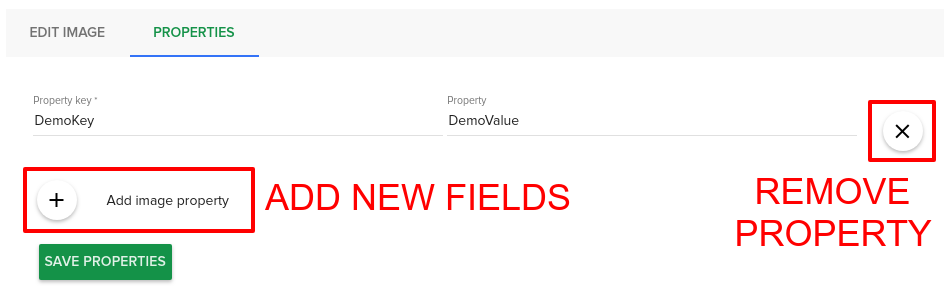
Here you can add custom properties for the image that will be saved in the properties key from the image object. You can add new fields by clicking the (+) button and remove them by clicking the x button.