Staff / Cloud / Instances
Instances view
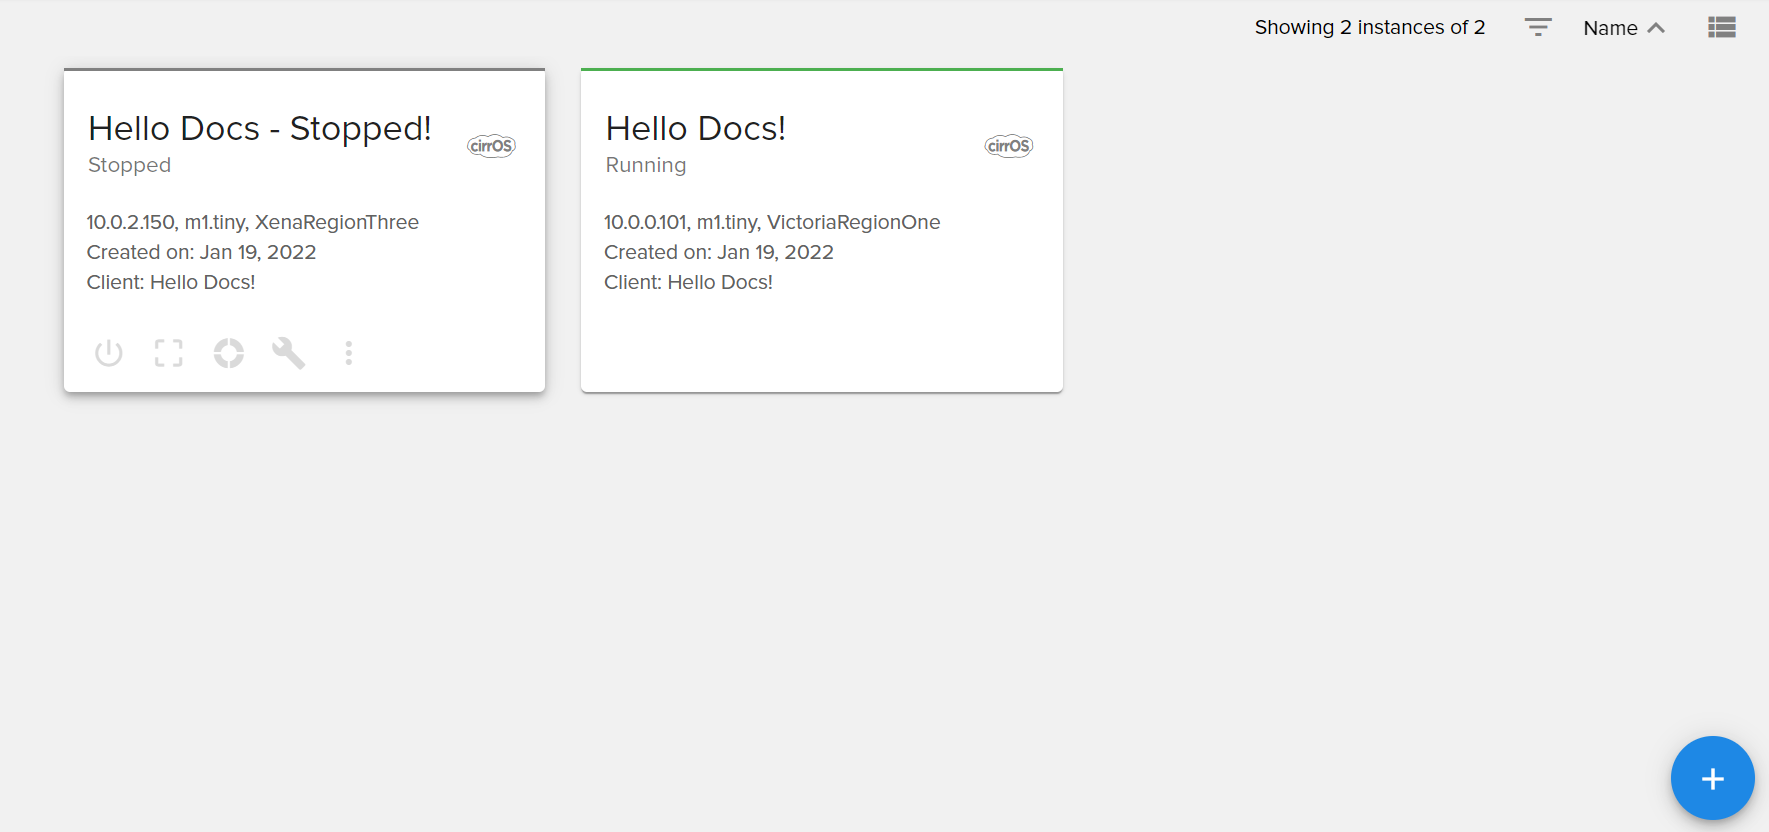
The instances view can be displayed in two different types of views:
Card view

List view

Filtering instances
The instances can be filtered by:
created at
client
status
task state
flavor
flavor name
availability zone
hypervisor
image
image os distro name
region
client status
service status
Sorting instances
The instances can be sorted by:
creation date
name
region
availability zone
status
current cycle traffic
current month traffic
Create new instance
To create a new instance, click on the + sign from the bottom-right corner.
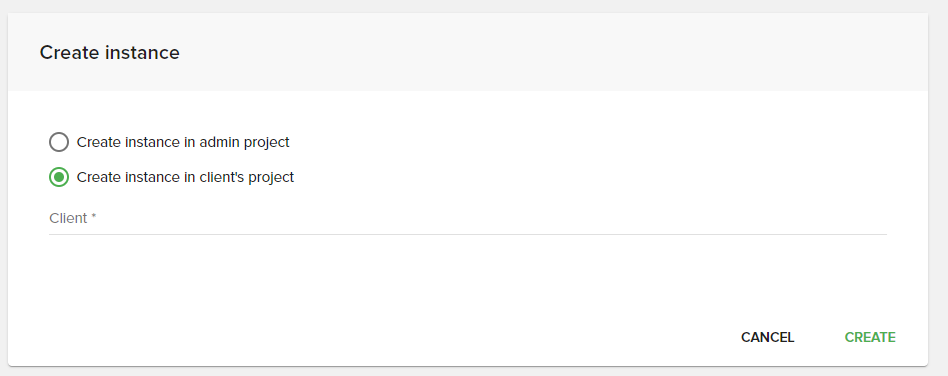
As you can see, you can chose to create the instance either in the admin project, or in a client’s project.
Create new instance in admin project
Choosing to create the instance in the admin project will open the following form:
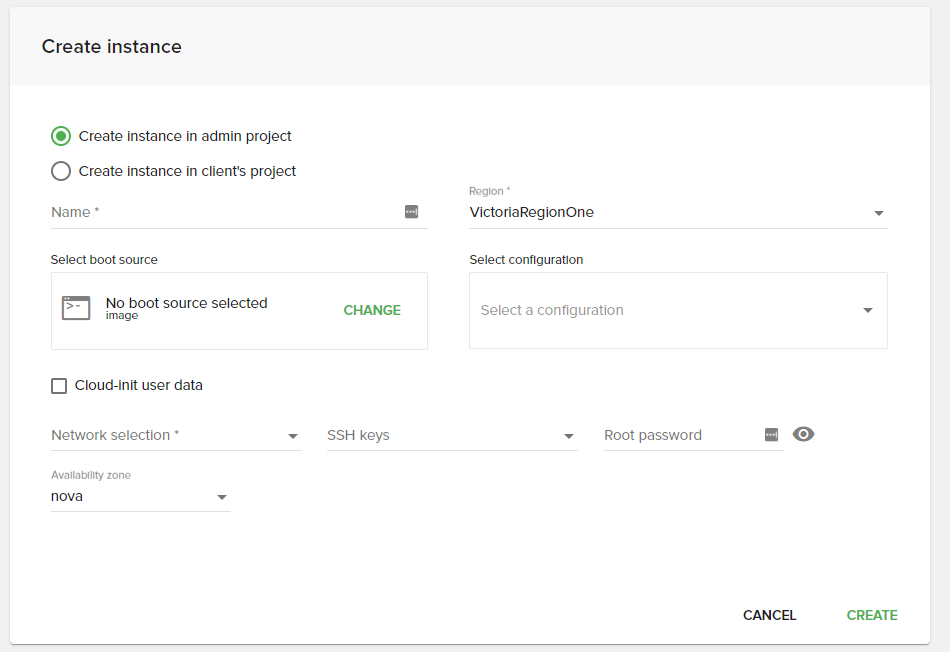
The following fields are mandatory, in order to be able to create the instance:
Name: OpenStack compute instance name
Region: Select the region (location) where the instance is created.
Select boot source: The image from which the instance is booted. You can also boot from an instance snapshot if any is available.
Select a configuration: OpenStack instance flavor. Configurations (flavors) hold information about the instance memory, disk space and the number of virtual CPUs.
Cloud-init user data: Optionally, paste a cloud-init script
Network selection: Networks to which the instance is added. If no networks are shown or a network that you expect to have is missing, see how to trouble shoot this.
SSH keys: Select SSH keys to be added to the instance on boot. The SSH keys that were previously added are shown here.
Root Password: You can view the typed password by clicking on the eye icon from right.
Assign floating IP: If user selects a private network and
Show floating IP checkbox on instance createis selected in region settings, this checkbox is available. After being checked the user further selects theFloating IP networkwhich will be used to automatically create a floating IP after the instance becomes active. The automatically created floating IP will then be auto-assigned to the corresponding port on the instance.
Create new instance in client’s project
Choosing to create the instance in the client’s project will open the following form:
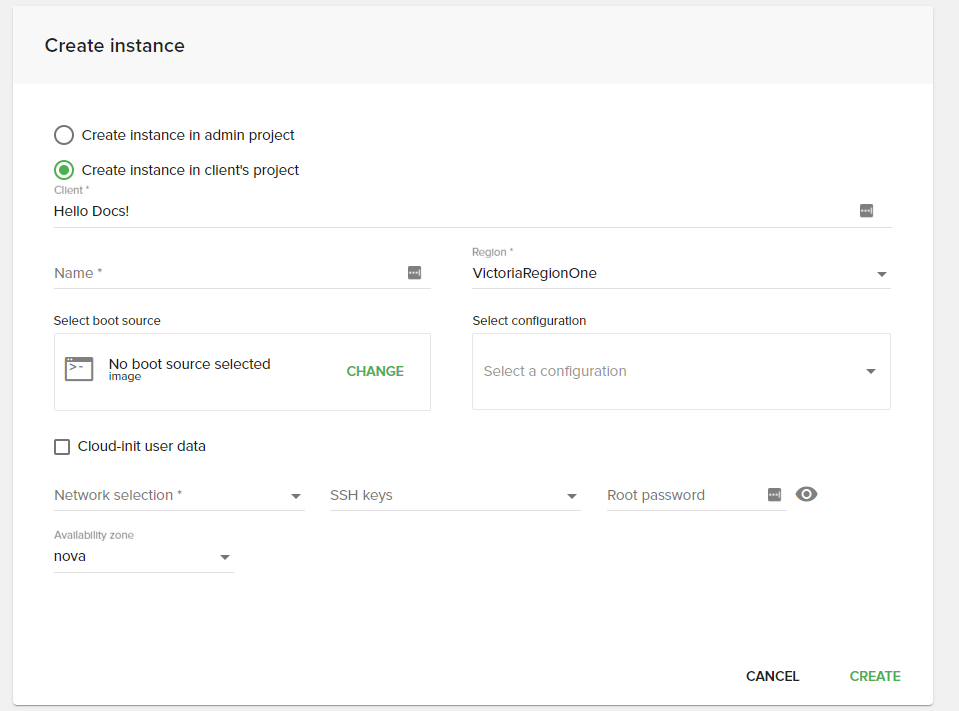
Besides the fields already mentioned earlier (when creating instance in the admin project), you will have to also choose the client for which you want to create the instance.
Note
The client must have an OpenStack project assigned to his OpenStack service in order to be able to deploy instances in his project.
Instance details
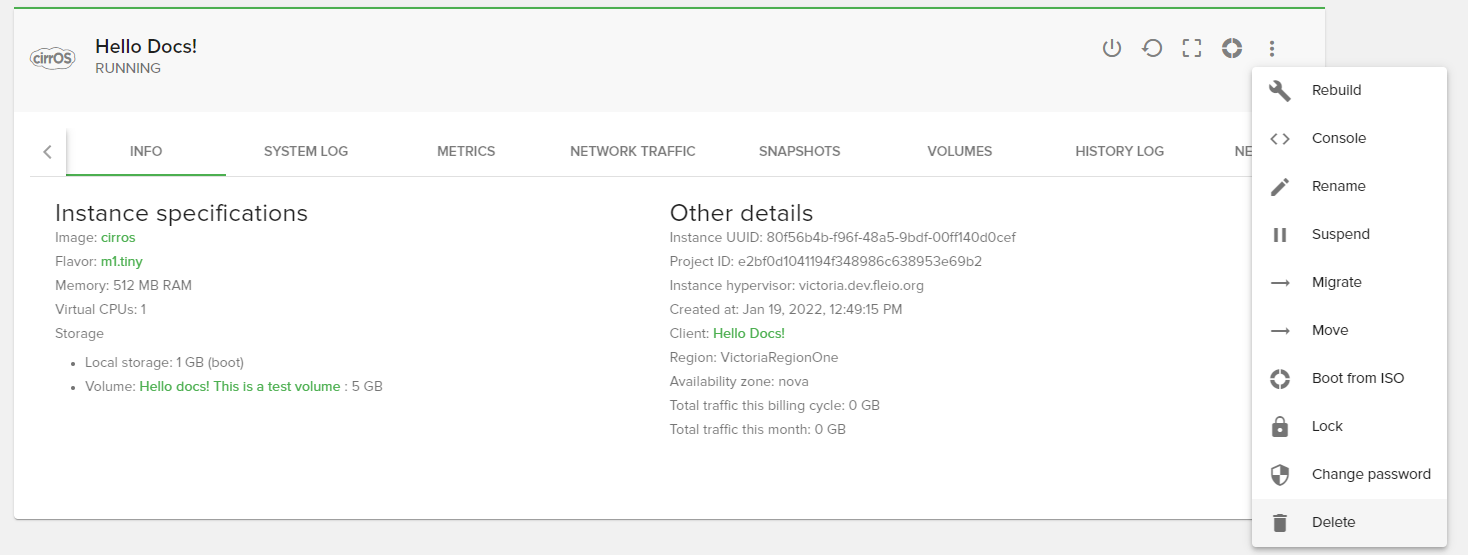
When clicking on an instance, you will be able to see the following instance details:
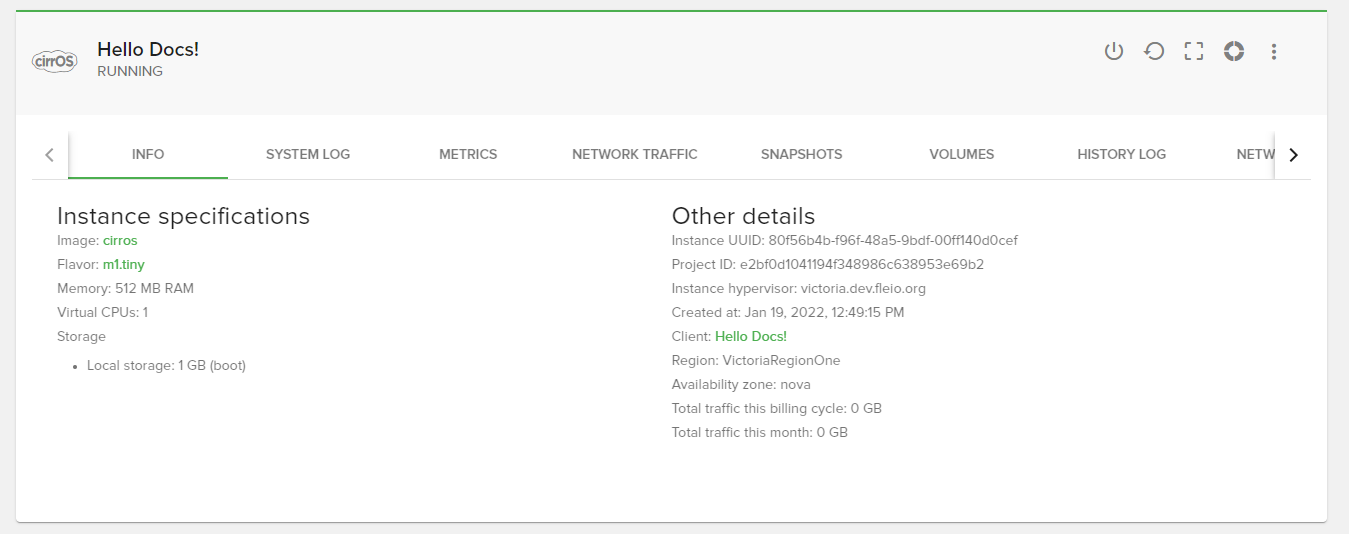
Instance details / Info

On the info tab, on the instance details page, you will be able to see the following details:
instance specifications (image, flavor, memory, vCPUs, storage and storage type)
other details (instance UUID, project ID, instance hypervisor, created date, client, region, availability zone, total traffic this billing cycle, total traffic this month)
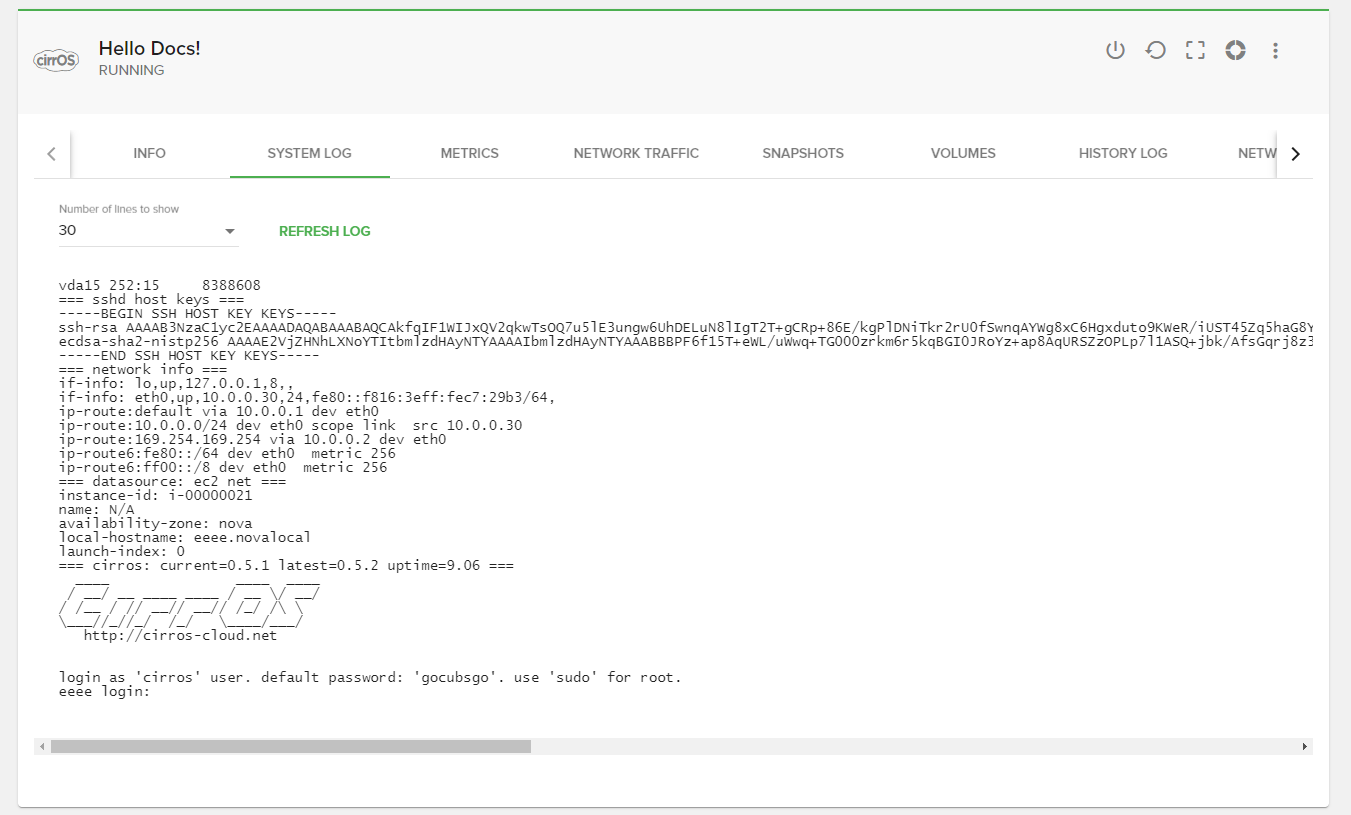
Instance details / System logs
On the system logs tab you will be able to see the instance’s system logs:
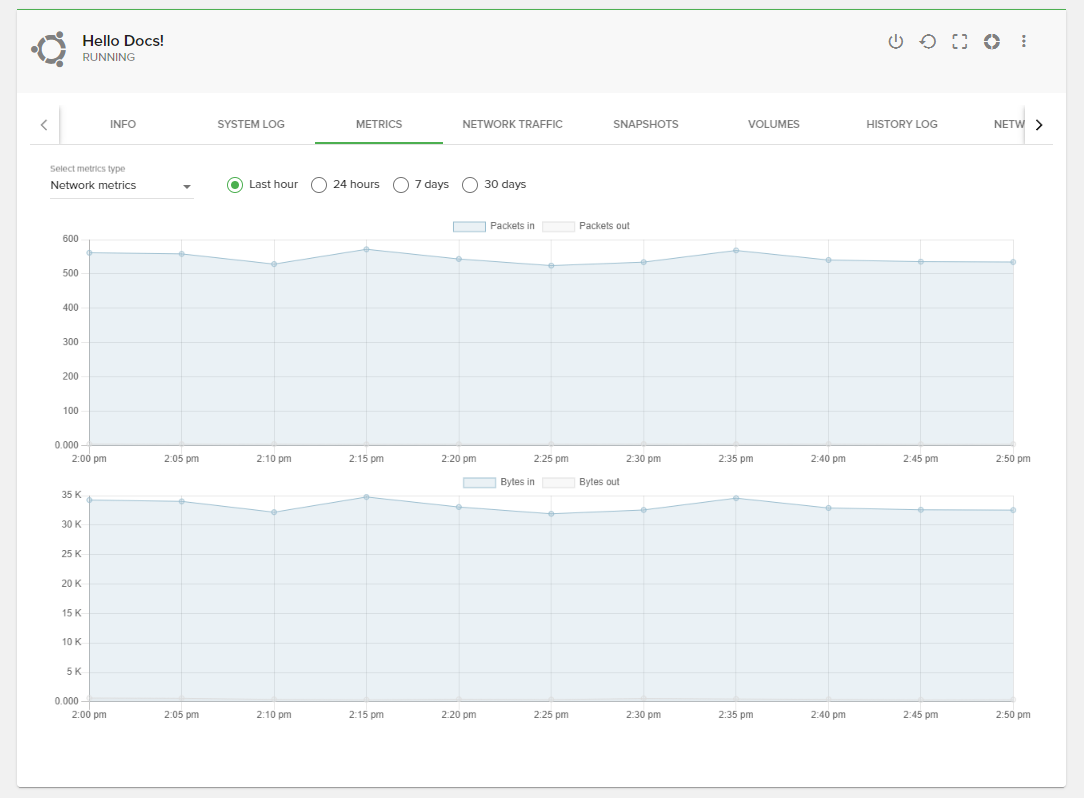
Instance details / Metrics
Important
You need to have Ceilometer service installed and configured in order to use see the metrics.
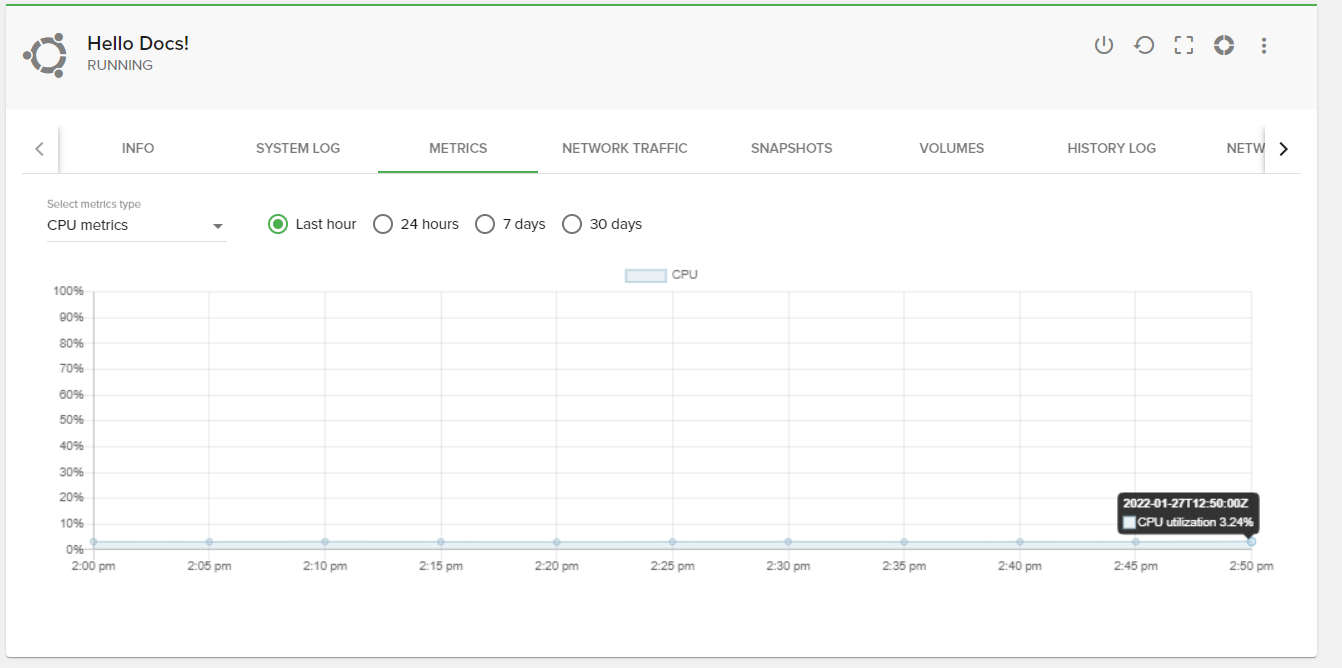
On the metrics tab, you will be able to see the network metrics and the cpu metrics:
Instance details / Network traffic
Important
You need to have Ceilometer service installed and configured in order to use see the metrics.
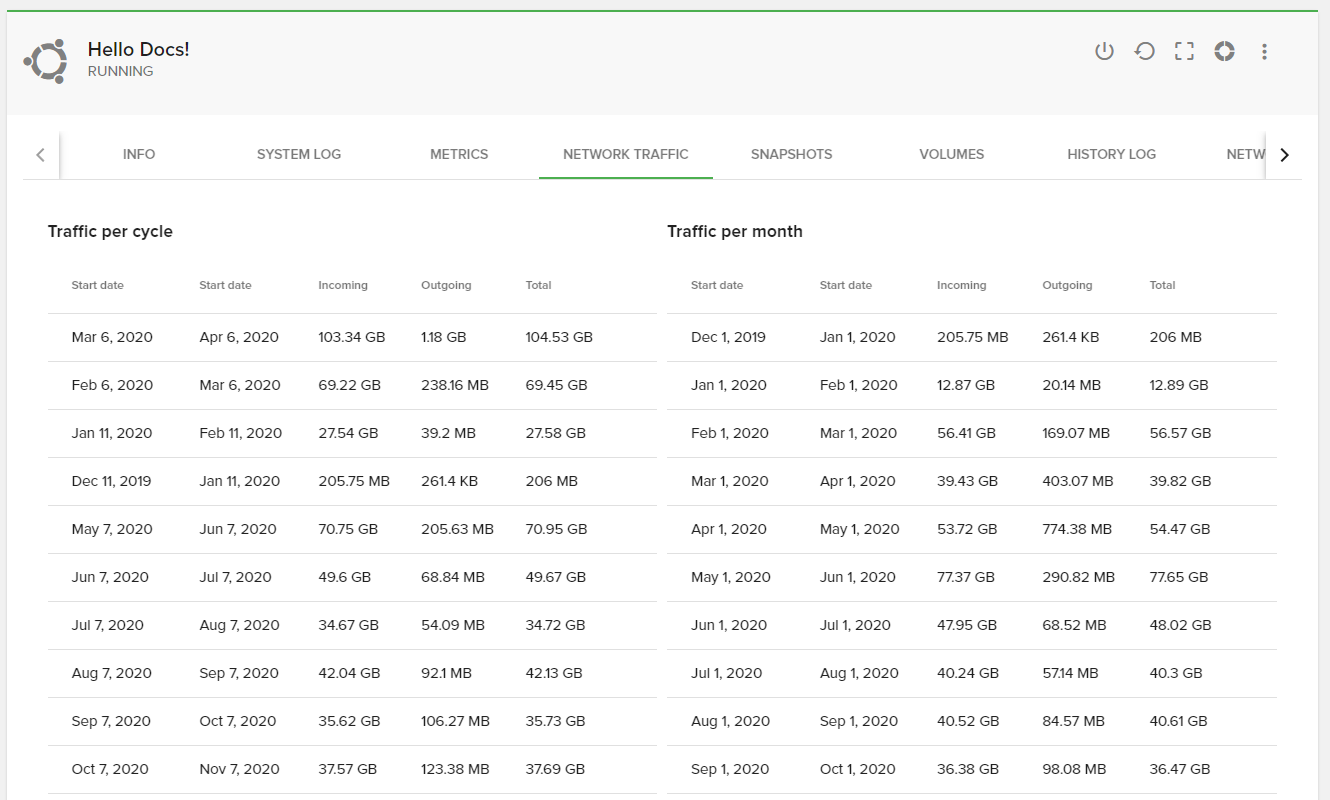
On the network traffic tab you will be able to see a detailed history of the network traffic for that instance:
Instance details / Snapshots
On the Snapshots tab, you will be able to:
create snapshot (in admin project or in client project)
see the already existing snapshots
edit a snapshot
launch a new instance using the desired snapshot
rebuild current instance using the desired snapshot
download image
delete snapshot
To create a new snapshot you will need to press the Create snapshot button. The following form will be opened:
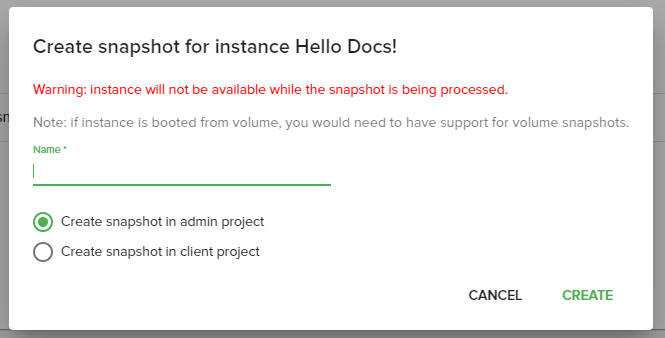
The snapshot can be created either in the admin project (no charges will be applied to your client) or in the client project.
To edit/launch/rebuild current instance/download/delete snapshot you need to use the action buttons available on each snapshot row:

Instance details / Volumes
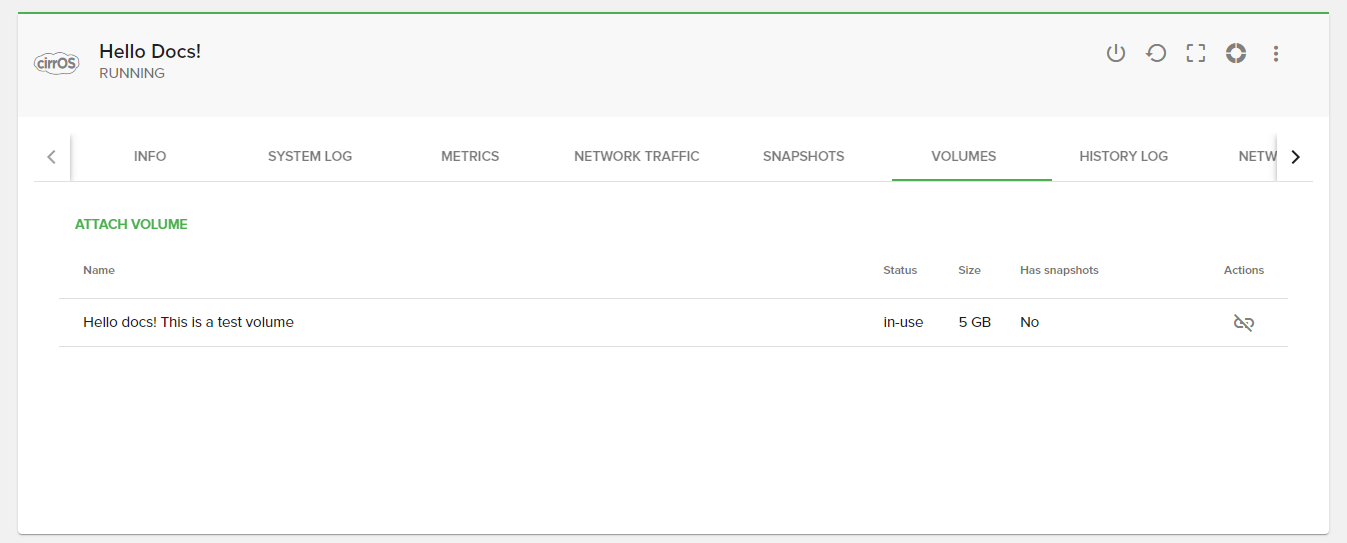
On the volumes tab you will be able to:
see the attached volumes
attach / detach volumes to the instances
In order to attach a volume you will need to click on the Attach volume button. Upon clicking that button, you will see all the available volumes that were created in the same project as the instance was created.
To detach a volume you will need to click on the Detach volume action button.
Note
Detaching a volume will not delete that volume.
Instance details / History log
On the history log tab, you will be able to see the actions that were done to this instance, such as the following:
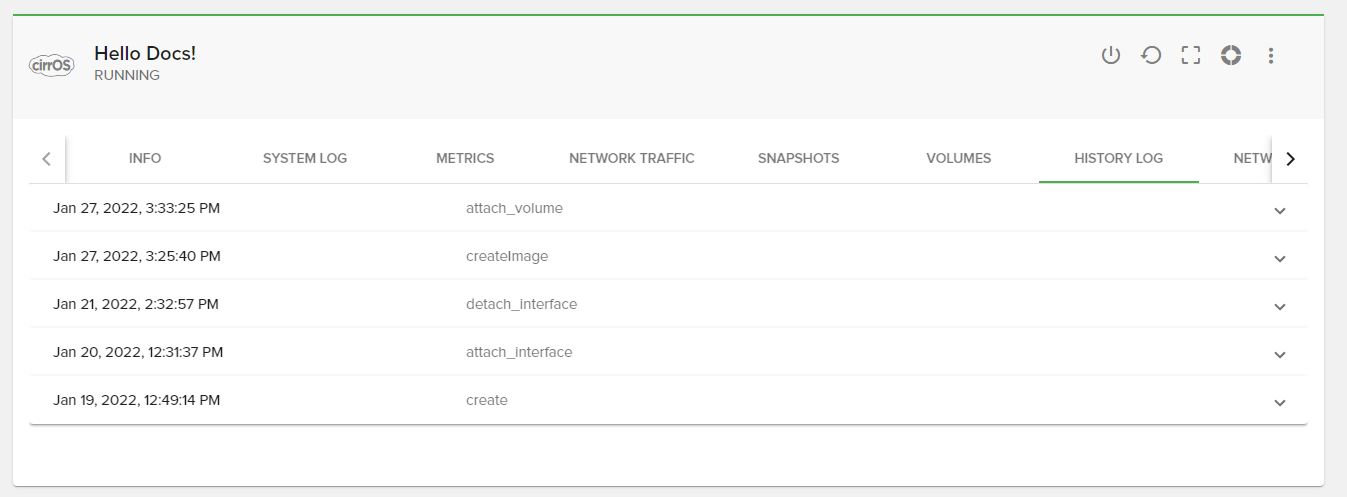
Note that the history log will contain all the actions that were done on the instance (including start, stop, resize, etc), and the history is pulled directly from OpenStack.
Instance details / Networking
On the networking tab you will be able to see and manage the networking details of your instance.
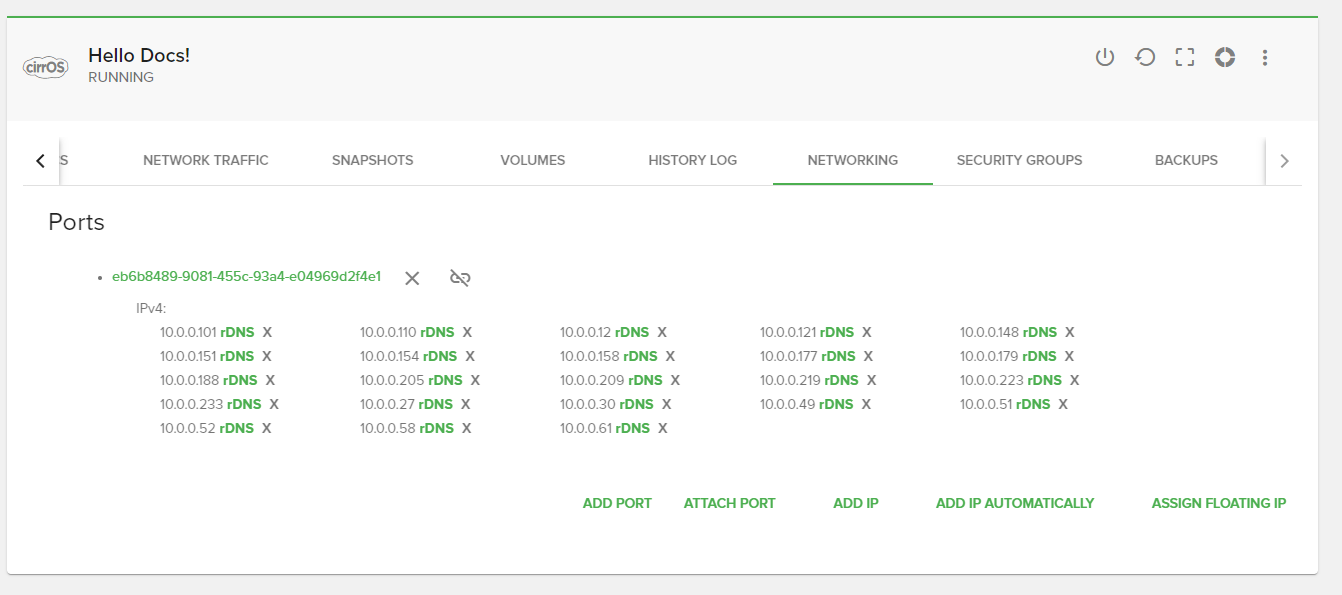
The following actions are available on this tab:
add / delete port
attach / detach port
add /remove ip
add ip automatically
assign floating IP
configure RDNS
Instance details / Security groups
On the security groups tab you will be able to manage the security groups that are assigned to your instance.
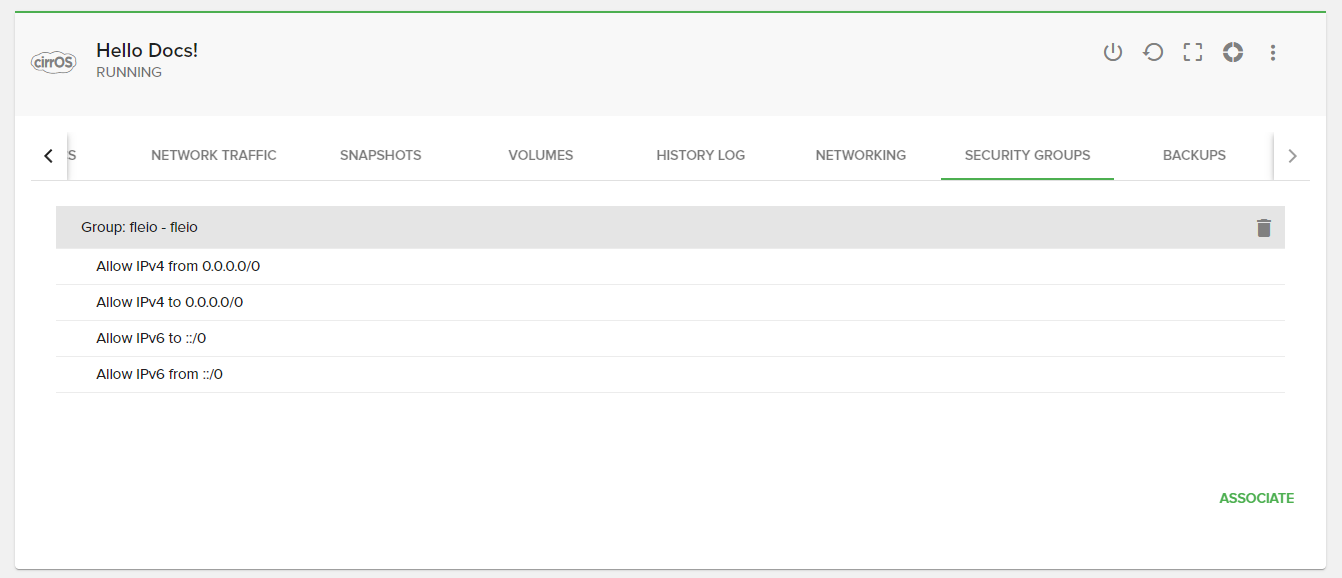
In order to associate a new security group to your instance, you need to click on the Associate button in the bottom right corner.
To dissociate a security group from your instance, you need to click on the trash bin icon.
Instance details / Backups
Note
For scheduled backups to work, you need to define the scheduled backups task schedule.
On the backups tab, you will be able to manage your instance’s backups:
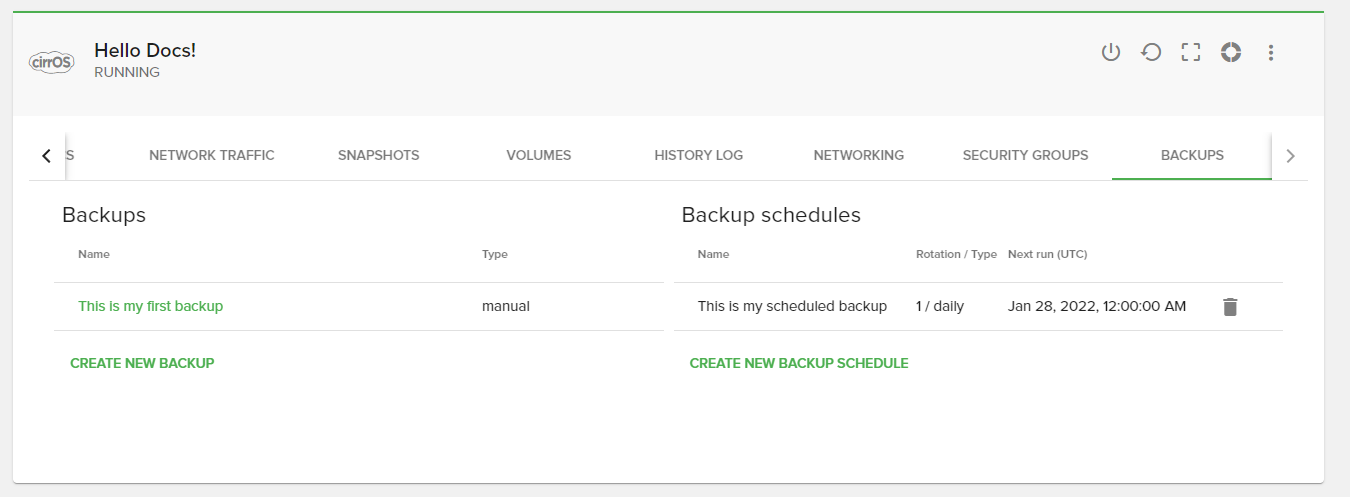
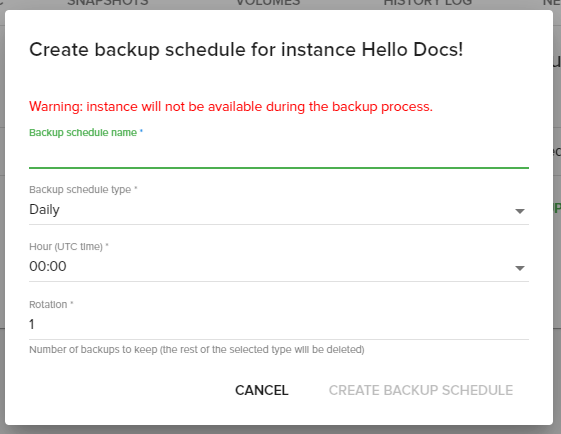
As you can see in the previous picture, you will be able to create a new backup schedule by clicking on the Create new backup schedule button. This will open the following form:
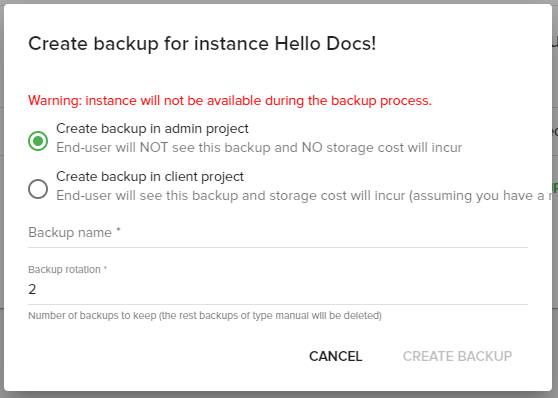
To create a manual backup, you will need to click on the Create new backup button, which will open the following form:
Available actions for instances
On each instance, a staff user will be able to do the following actions:
Shut down instance
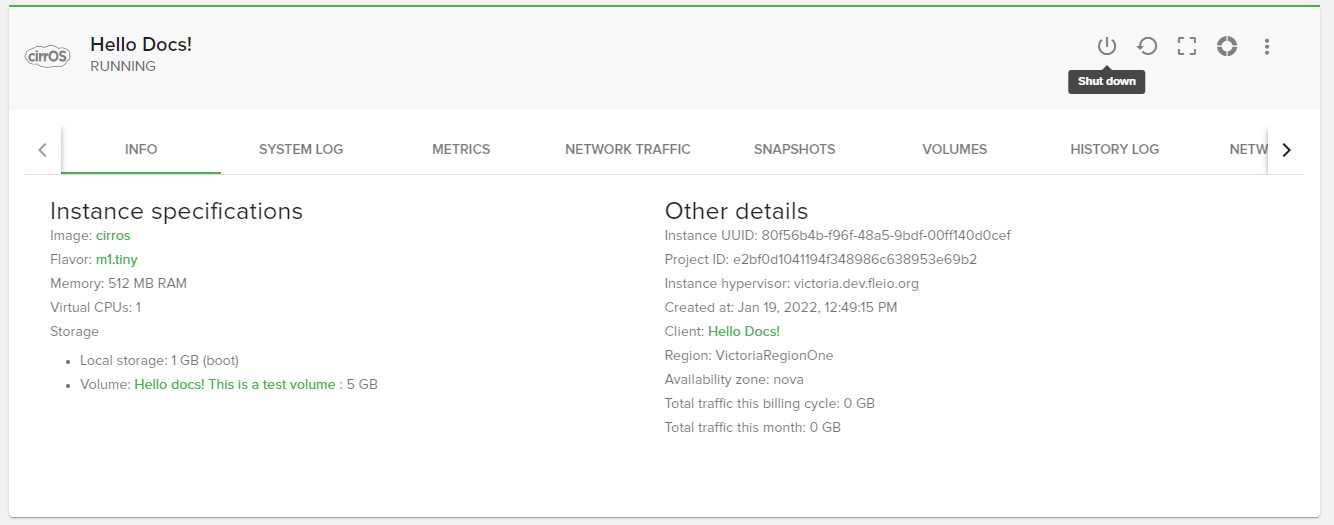
In order to shut down the instance you need to click on the Shut down instance button:
Start instance
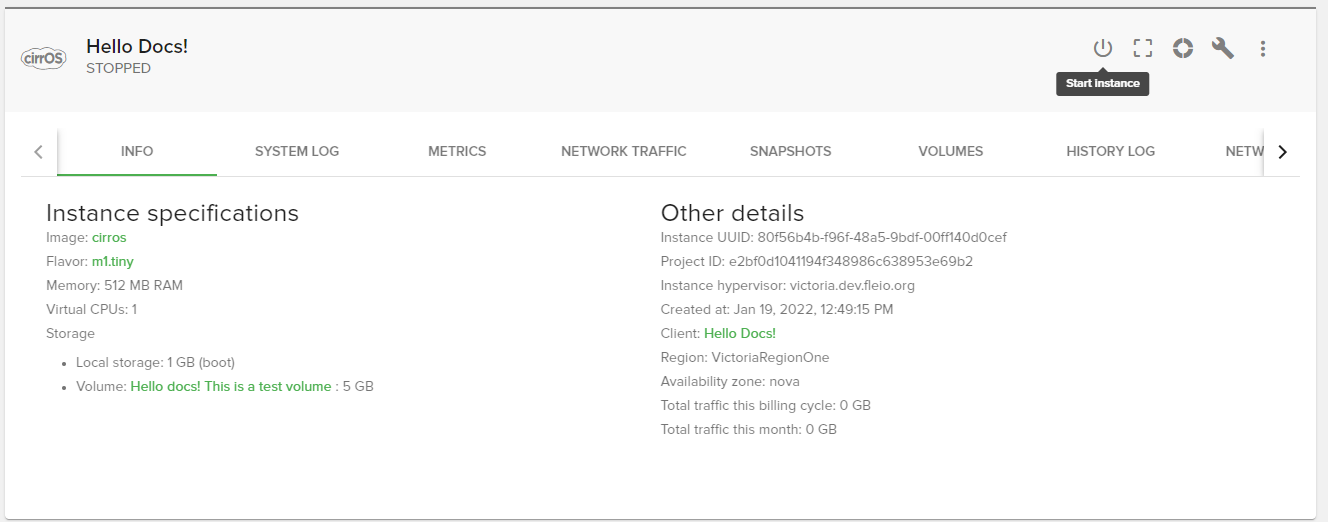
In order to start the instance you need to click on the Start instance button:
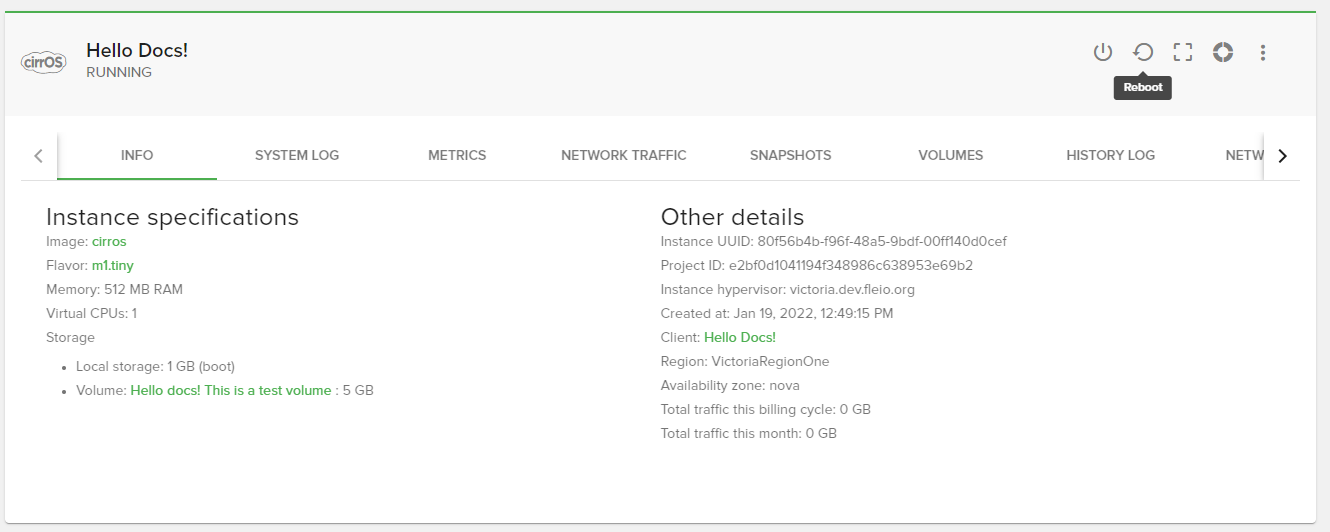
Reboot instance
In order to reboot the instance you need to click on the Reboot instance button:
Resize instance
In order to resize the instance you need to click on the Resize instance button:
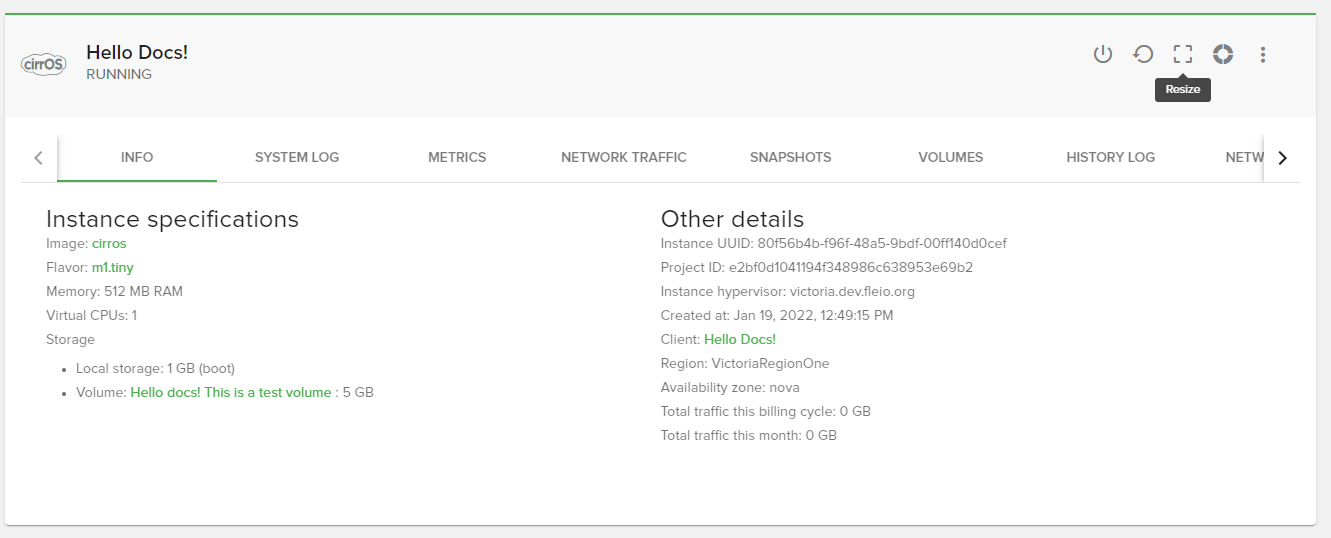
Upon clicking on the resize instance button, the following form will be opened:

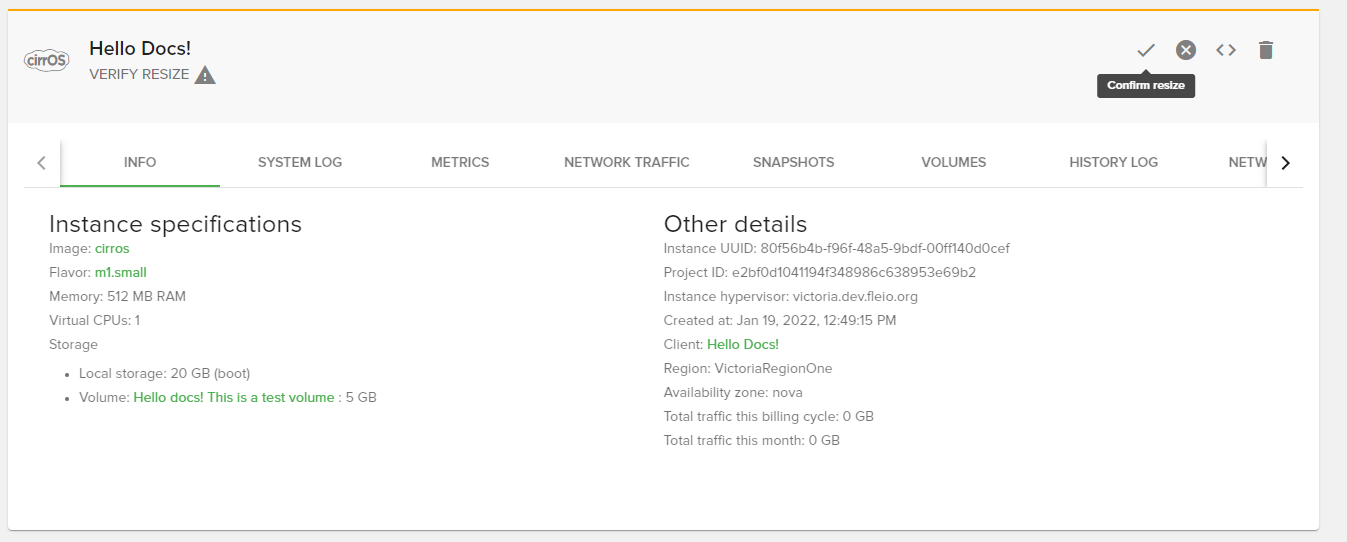
After resizing the instance, you will need to confirm the resize, by clicking on the Confirm resize button:
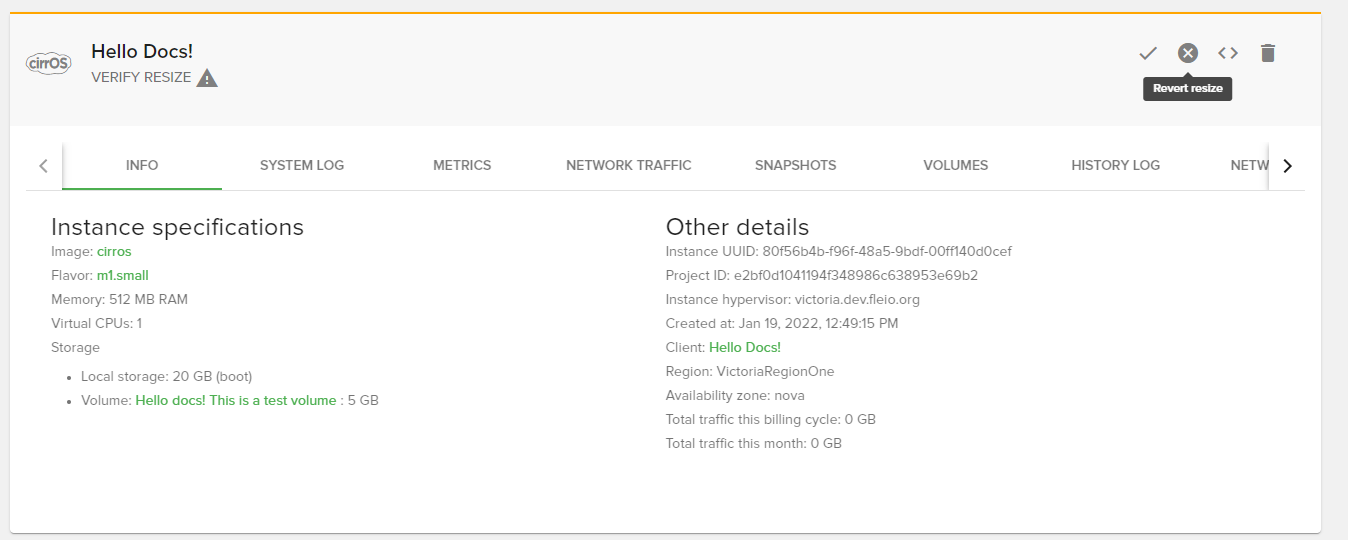
If you want to revert the resize, you can click on the Revert resize button:
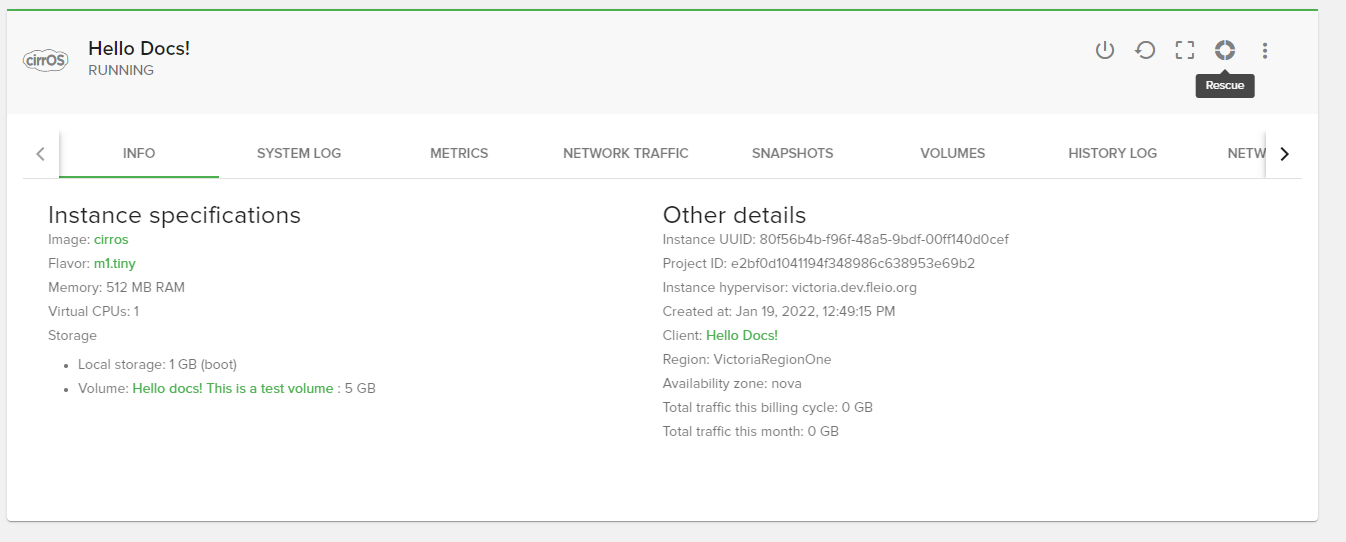
Rescue instance
In order to rescue the instance you need to click on the Rescue instance button:
Rebuild instance
In order to rebuild the instance you need to click on the 3 dots available in the top right corner, and then click on the Rebuild instance button:
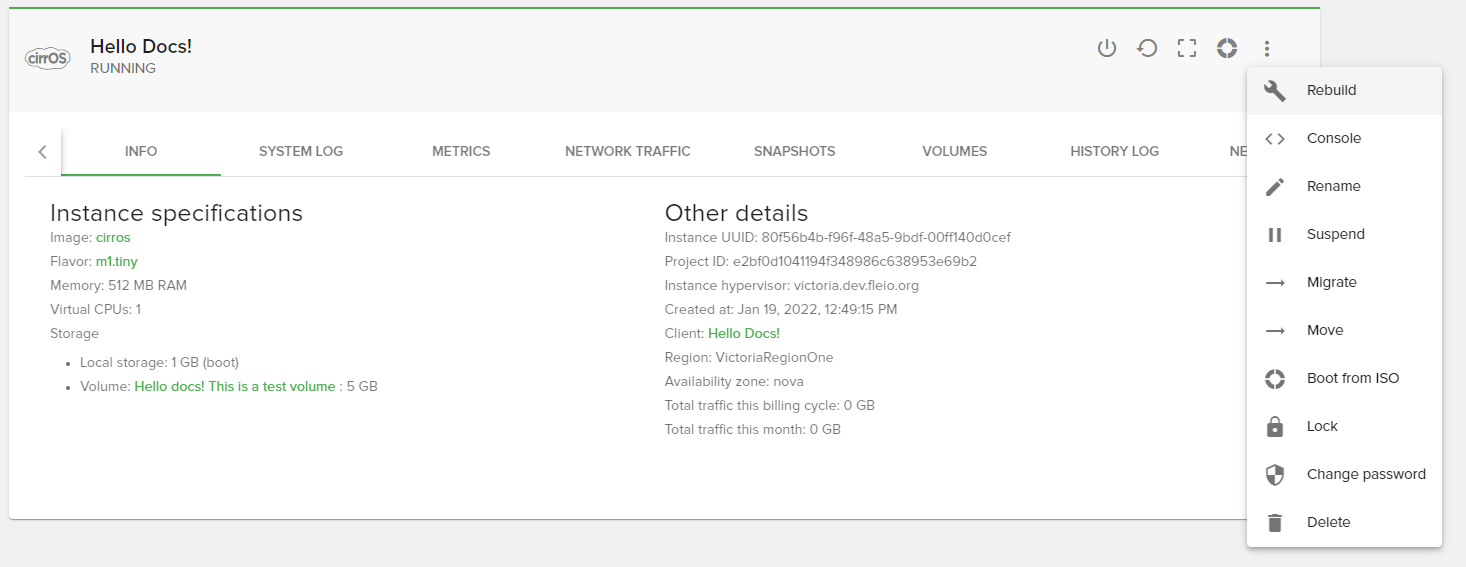
When rebuilding the instance you will be able to select a new boot source (even a different image than the original one).
Console
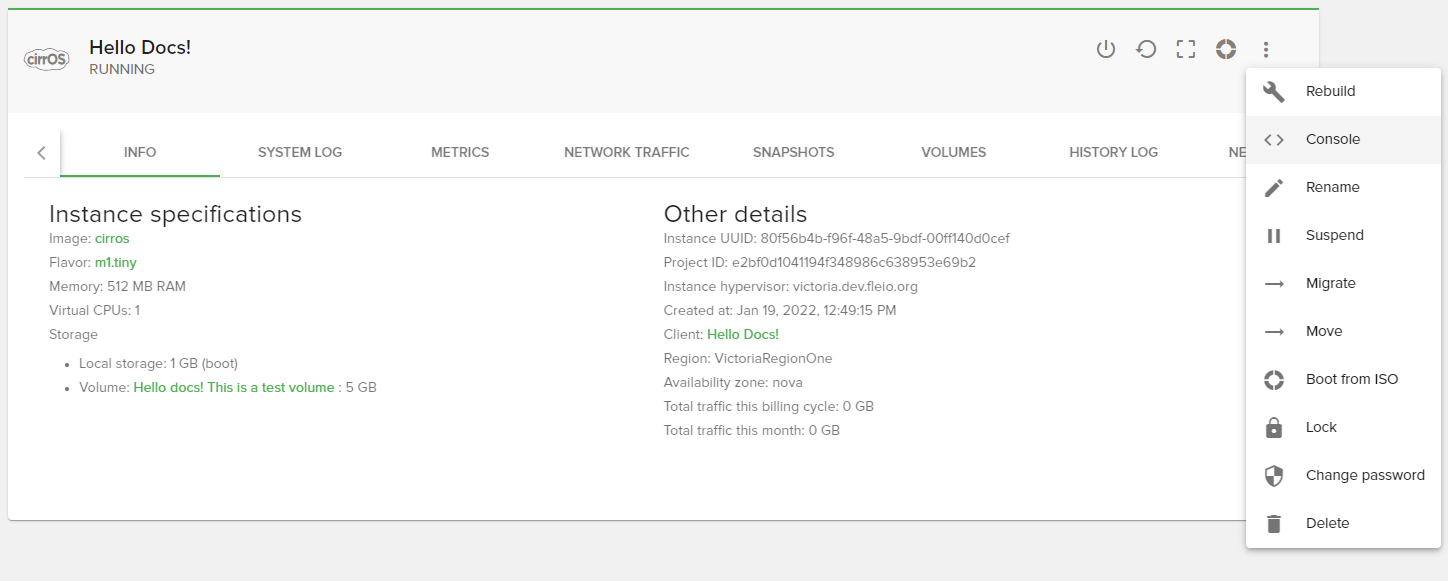
In order to access the console you need to click on the 3 dots available in the top right corner, and then click on the Console button:
Rename instance
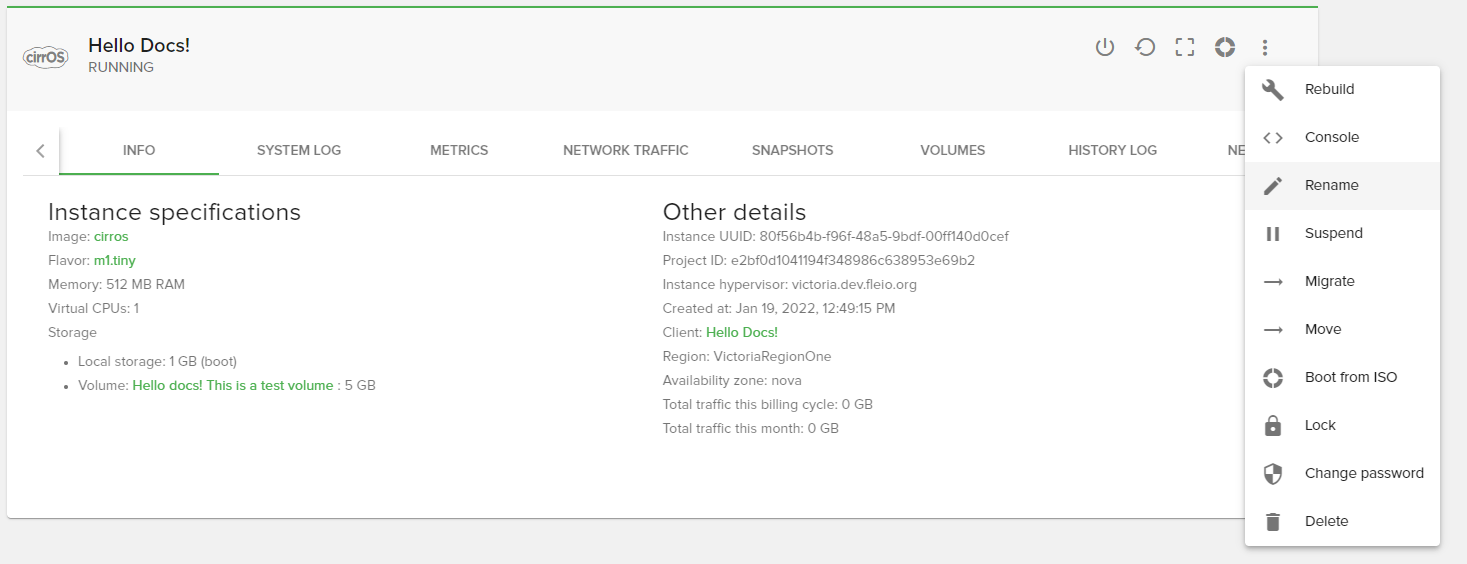
In order to rename the instance you need to click on the 3 dots available in the top right corner, and then click on the Rename instance button:
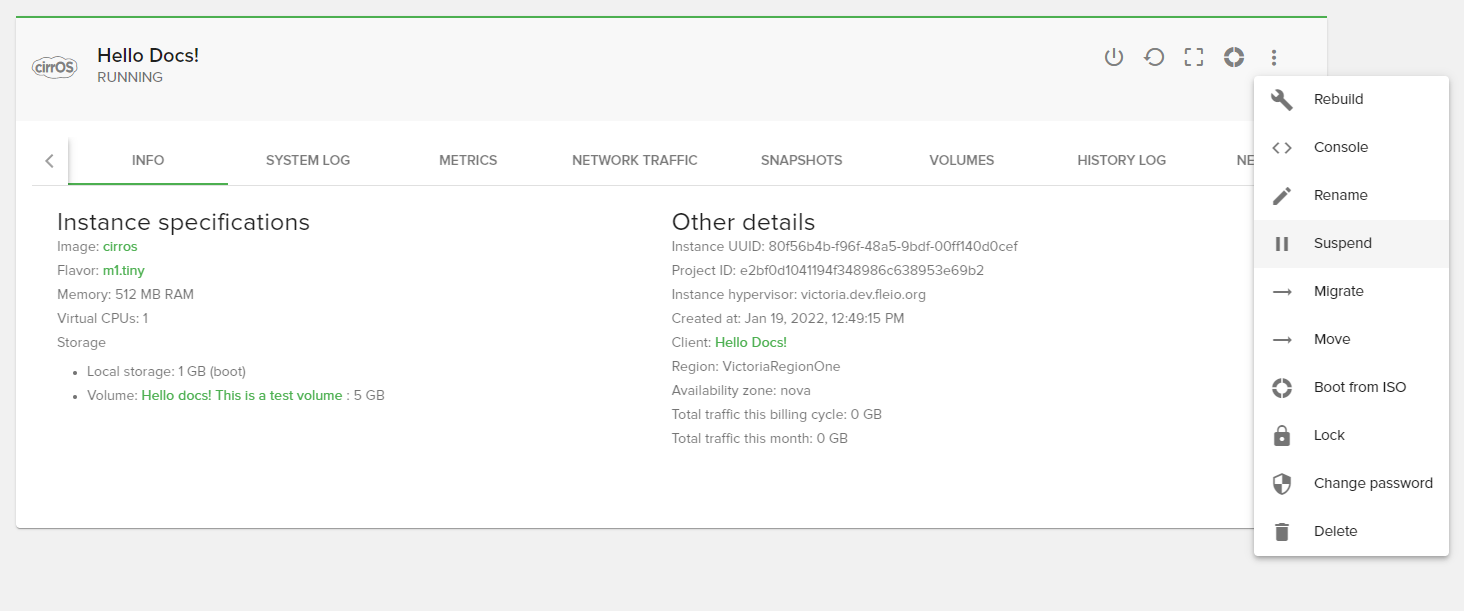
Suspend instance
In order to suspend the instance you need to click on the 3 dots available in the top right corner, and then click on the Suspend instance button:
Shelve instance
In order to shelve the instance you need to click on the 3 dots available in the top right corner, and then click on the Shelve instance button:
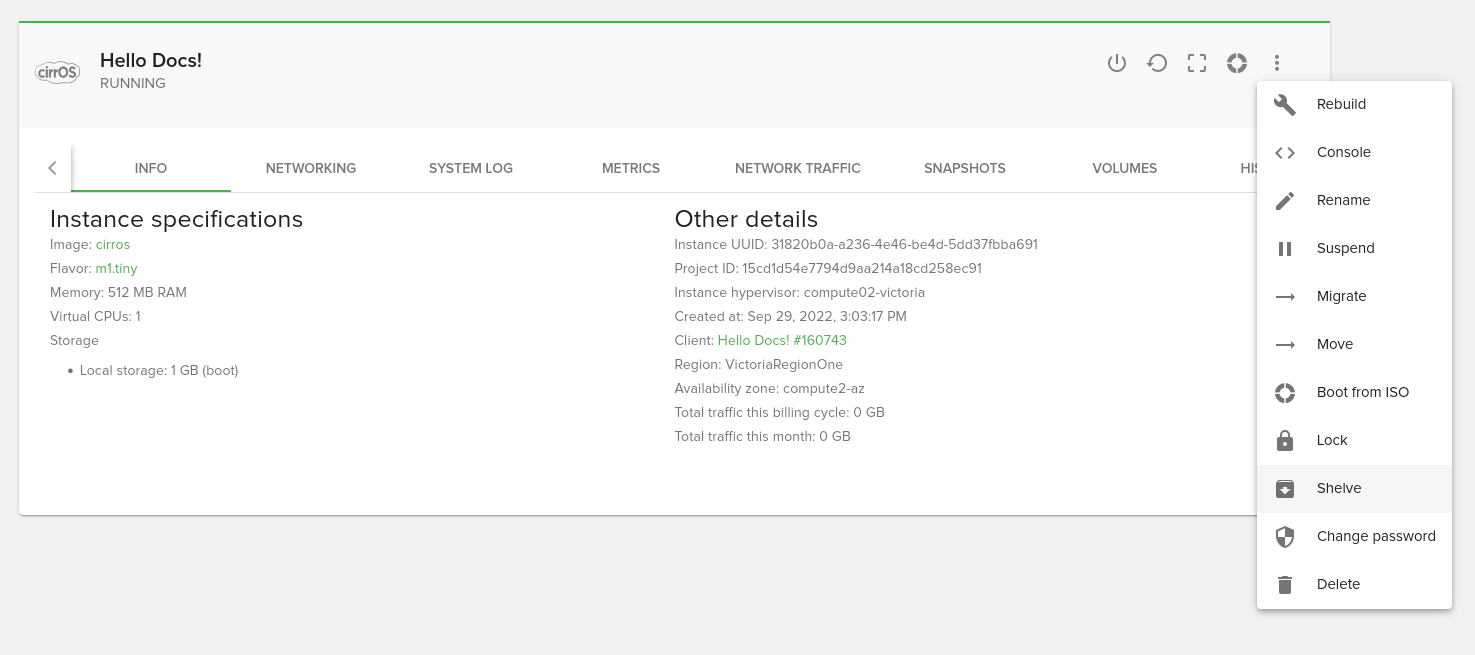
Shelving an instance will create a snapshot and remove it from the compute node eventually freeing up resources for other instances.
Only instances with one of the following statuses can be shelved: Running, Stopped, Suspended and Paused.
Unshelve instance
In order to unshelve the instance you need to click on the Unshelve instance button:
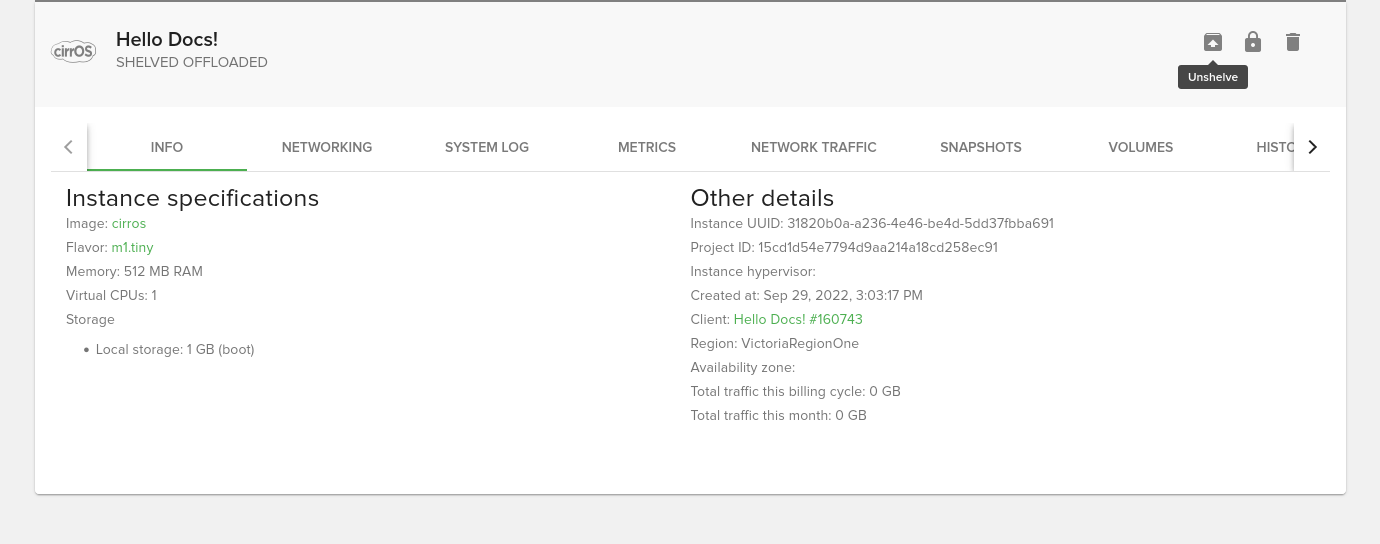
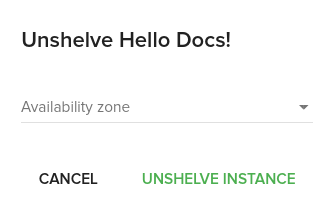
Unshelve will restore the instance to running state. A confirmation dialog will displayed when unshelving instance allowing the user to select an availability zone if the instance is not yet offloaded (status Shelved Offloaded).
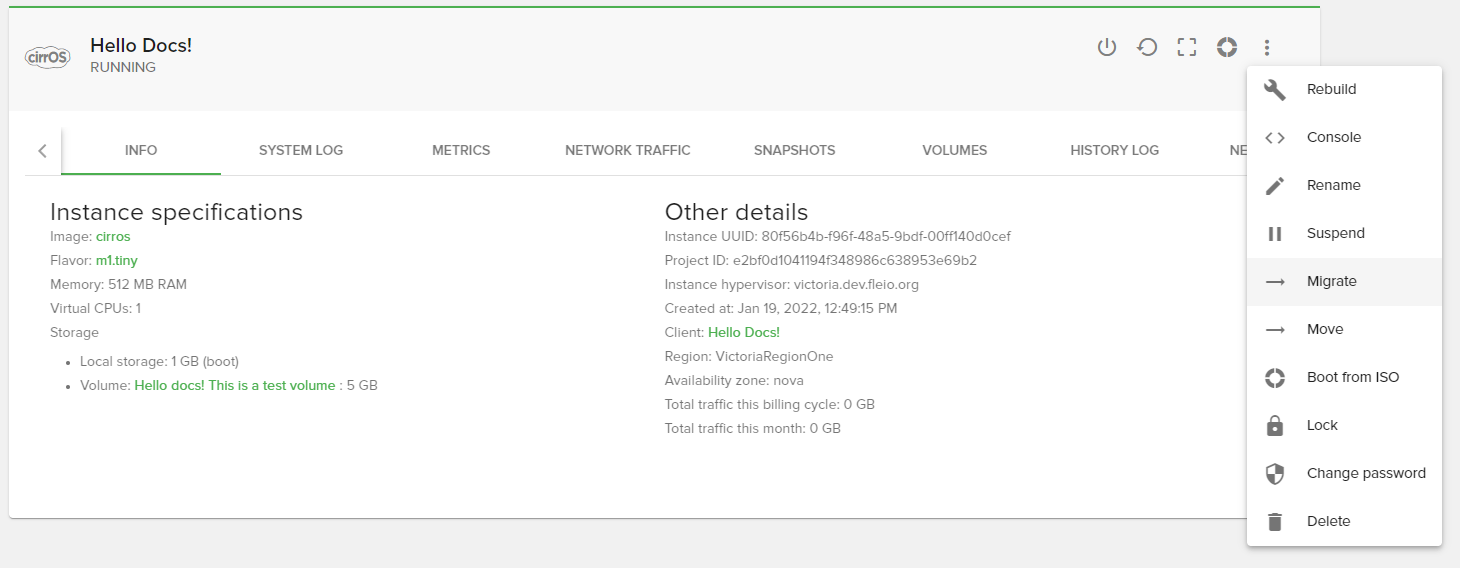
Migrate instance
In order to migrate the instance you need to click on the 3 dots available in the top right corner, and then click on the Migrate instance button:
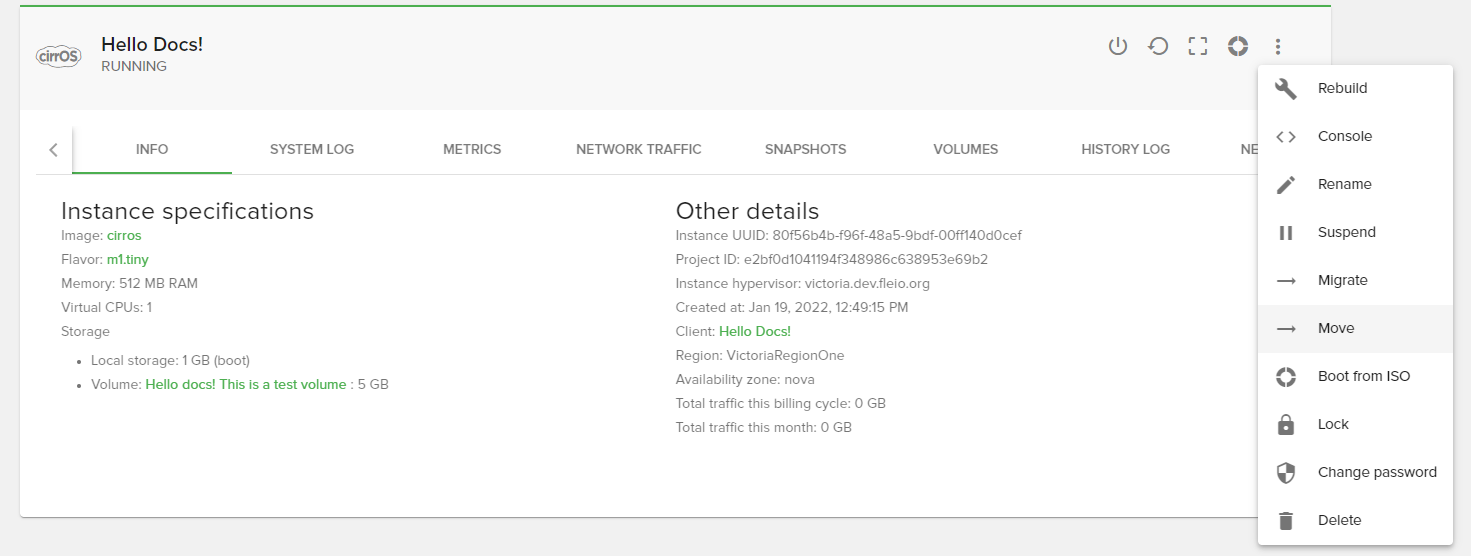
Move instance
In order to move the instance between clients you need to click on the 3 dots available in the top right corner, and then click on the Move instance button:
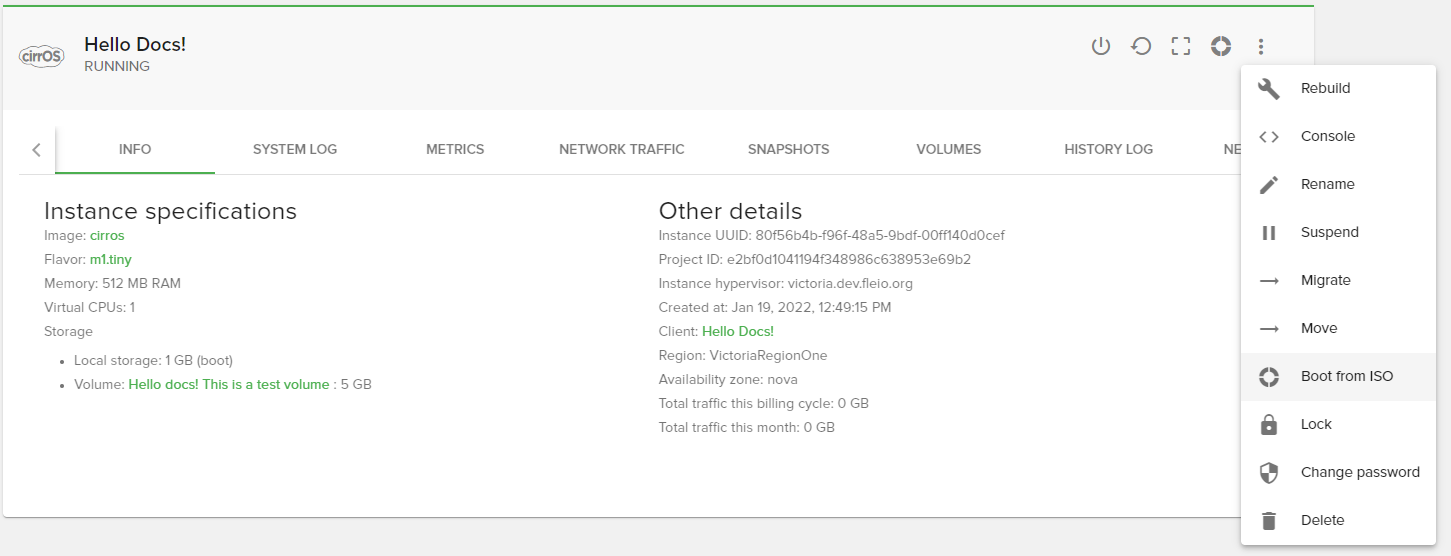
Boot from ISO
In order to boot the instance from ISO you need to click on the 3 dots available in the top right corner, and then click on the Boot from ISO button:
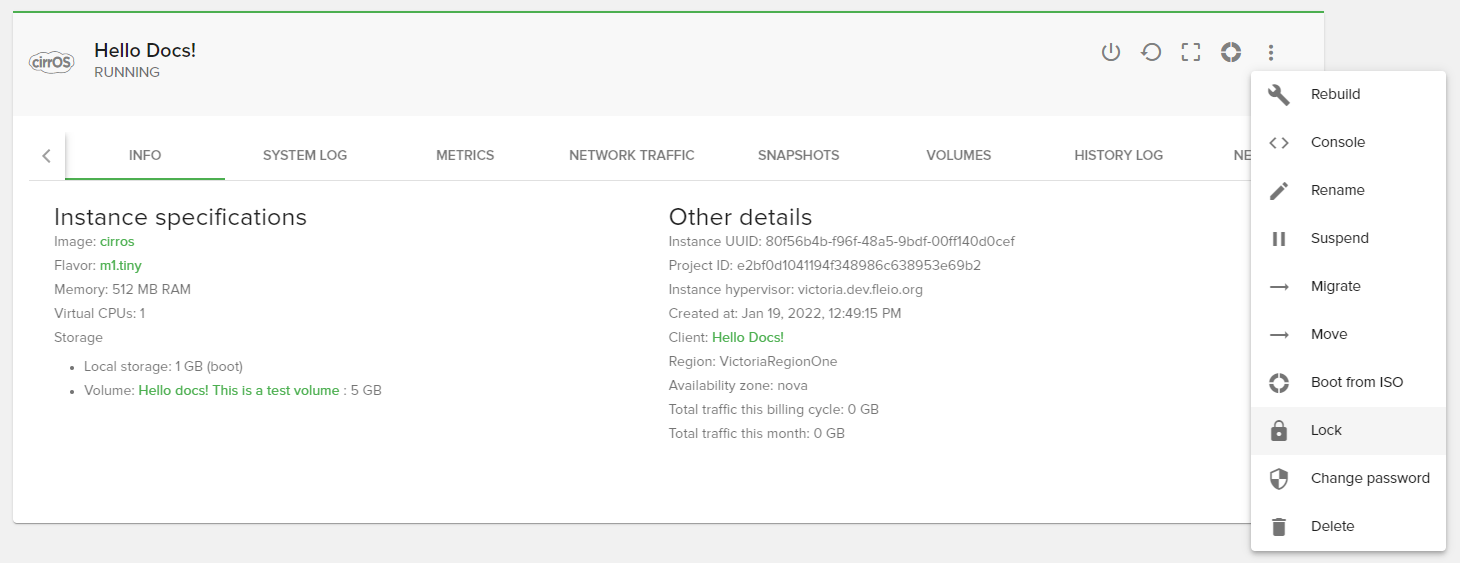
Lock instance
In order to lock the instance you need to click on the 3 dots available in the top right corner, and then click on the Lock button:
Change password
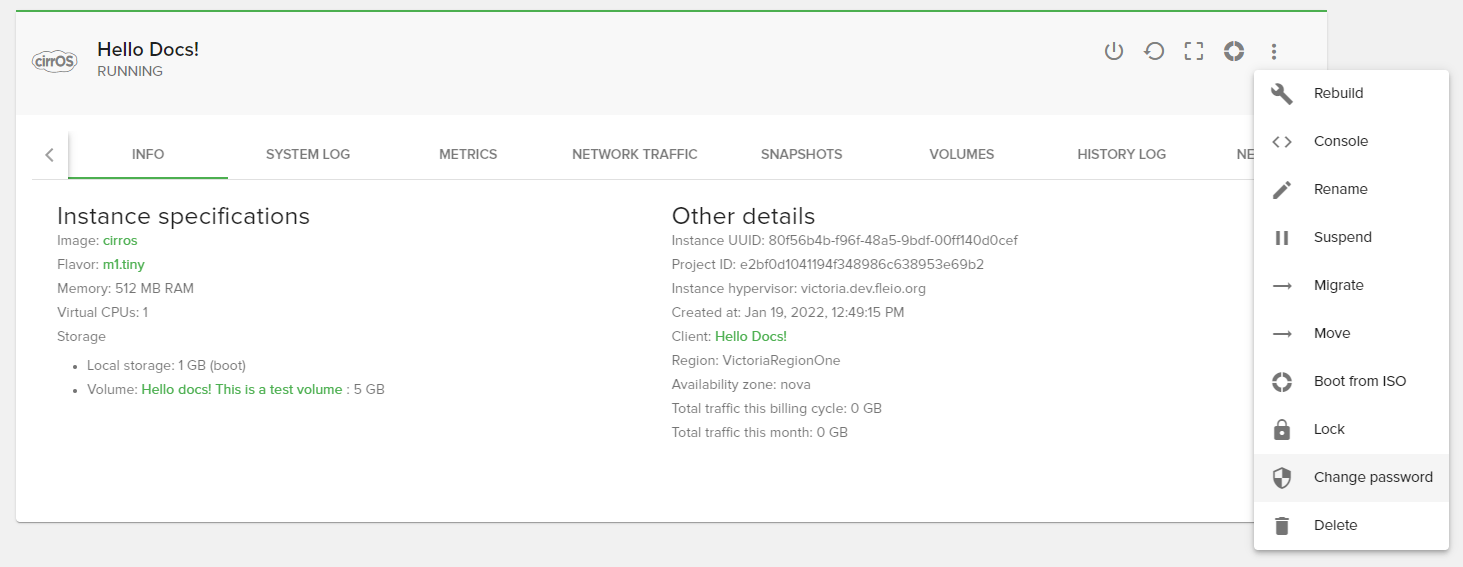
In order to change the password you need to click on the 3 dots available in the top right corner, and then click on the Change password button:
Important
This option will not work if you didn’t configured the Password and SSH key injection
Delete instance
In order to delete the instance you need to click on the 3 dots available in the top right corner, and then click on the Delete instance button:
